In the previous post I created a Poser model and a few OpenSCAD models and joined them into one. But before I continue to manipulate them to make them ready for 3D printing, I wanted to do an artistic rendering of the model, just to show off! This means that I want a complete background with water, trees and other stuff and the model in the middle of it all, well-lit and looking cool.
While it might seem a waste of time, it does give one extra view on your model before you continue processing. It will look okay but the OpenSCAD objects will not have any color. Problem is that painting those object cannot be done in Poser or OpenSCAD so if you want a specific coloring of those objects, you will need a special tool to do so.
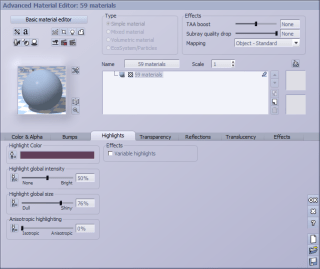
Modeling in Vue is quite easy. You just import the Poser model and then you put it where you want it to be. But once imported, you should turn down the highlights of the Poser model, else it starts to shine, which isn’t pretty. So, select the complete Poser model in Vue and click “Edit all materials” to change the highlights.
Vue now has a value of 50% for my model. This is actually the highlight of one part of your model and not all parts! But if you change this value, it will change it for all.
Since it has the value of 50%, I can simply overwrite it with 0. If it had been 0, I would have chosen the value of 1 instead.
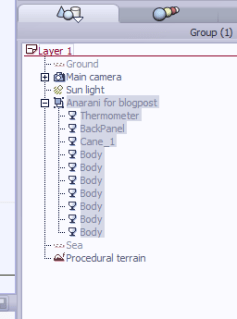
I have already removed the ruler from the list of parts in Vue and I can easily find the other pieces that I’ve created because of their names. Unfortunately, Poser tends to name all figures “body” while all properties keep their old name. And that’s a bit annoying.
Often I will rename those parts but this will just be a quick render so, skip it.
Since I lack the tools to paint the OpenSCAD models, I will just pick a few from the materials that Vue already has. I decide to pick grass for the back panel because it always looks good to have a model walking on grass. And I pick dark smoked glass for the box. The cane will be gold, making it shine.
Next, I check the materials that are provided by Poser. The dress, for example, has a zipper which uses a reflection map. I hate those, because Vue does a full 360-degree view of everything if I want to. Reflection maps are a poor alternative for real reflections.
I also decided to change the color of her bra. This won’t replace the texture but just the color. And I decide to pick an orange trim and green cloth, both pastel-tints.
I also decide to put the sun in the background to create a kind of ‘eye in the sky’ so I also need a second light, which I put at the location of the camera. To get it there, I just select the camera, which will put it in the center of the views. When you add lights or objects, they will be put at the same place. Thus, the light is at the location of the camera!
And a quick preview of the image shows me that it will look good. So let the rendering start!
Now, one reason I use Vue to create an artistic image is because it allows me to use a transparent material for some of the more complex objects. In this case, that would be the box with its round shape. With the image rendered at a large resolution I can check the box for possible flaws, if I want to use it again with another model.
In my next post I will show how I clean the model using Accutrans 3D. In the mean time, this is what the rendered artwork looks like:


