Google has something called the “AI Studio“, which is very interesting. It allows you to create chat prompts, provide a system setting as background information. And then you can make it tell a story!
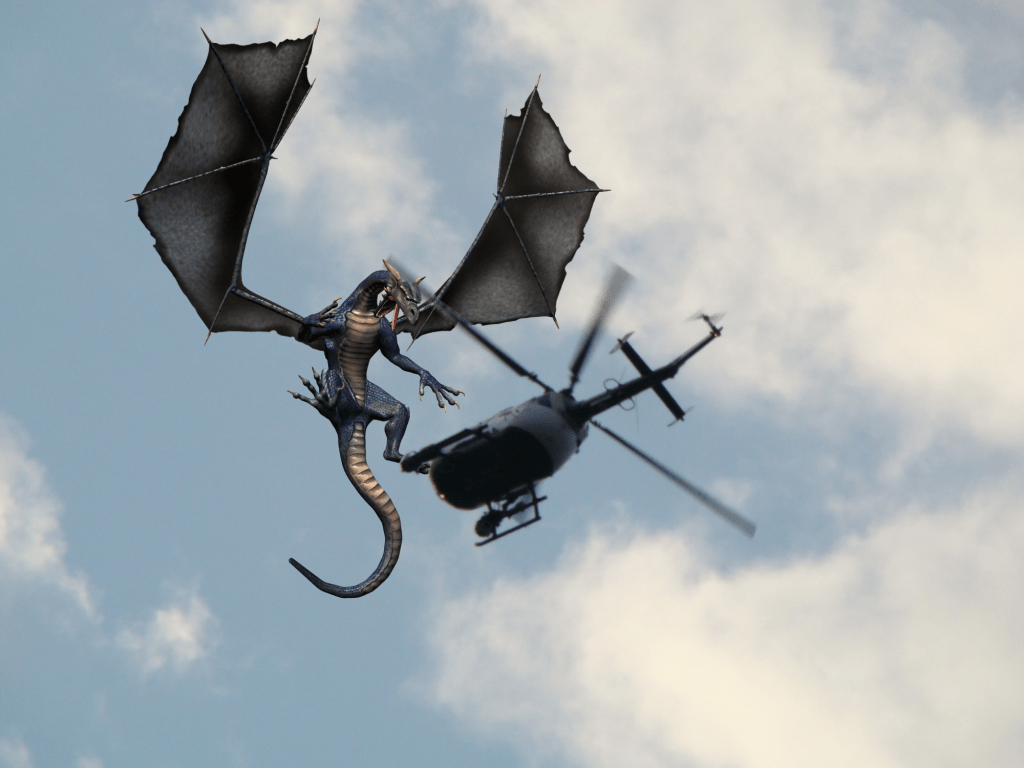
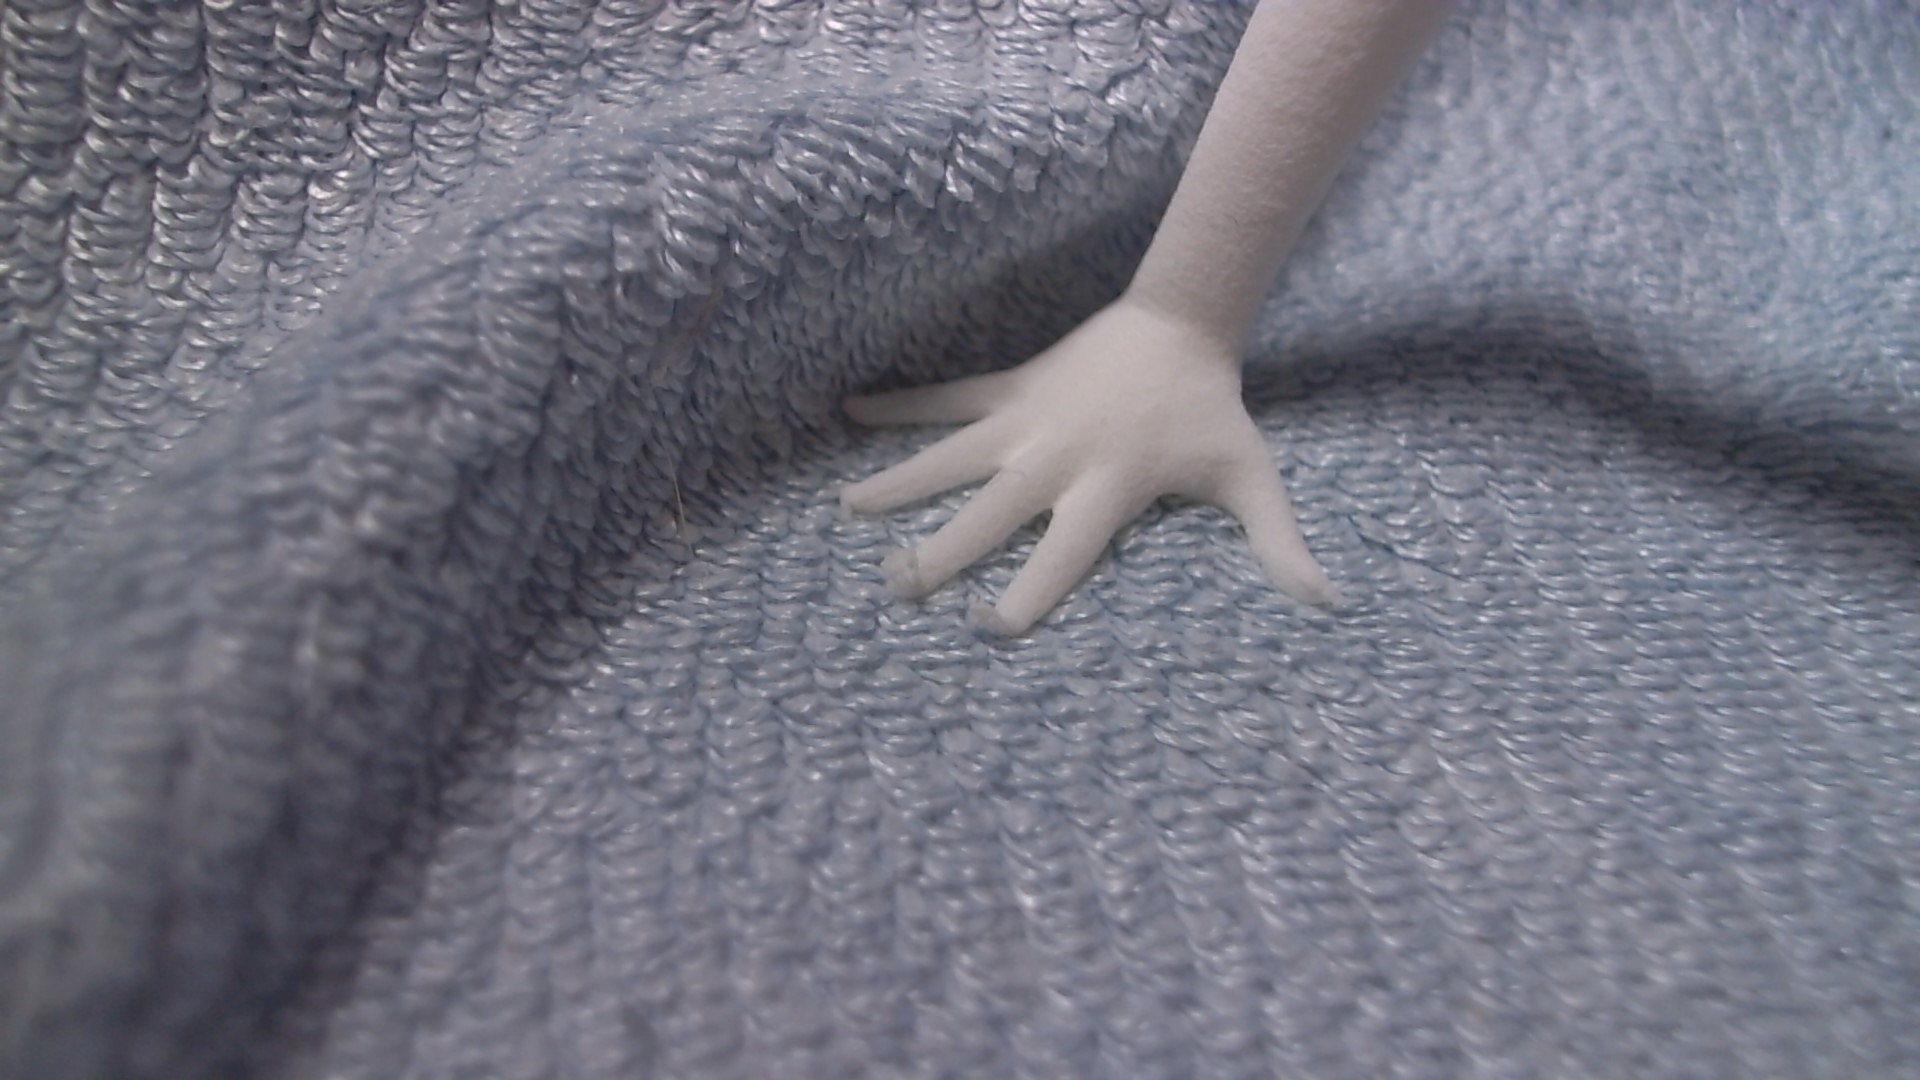
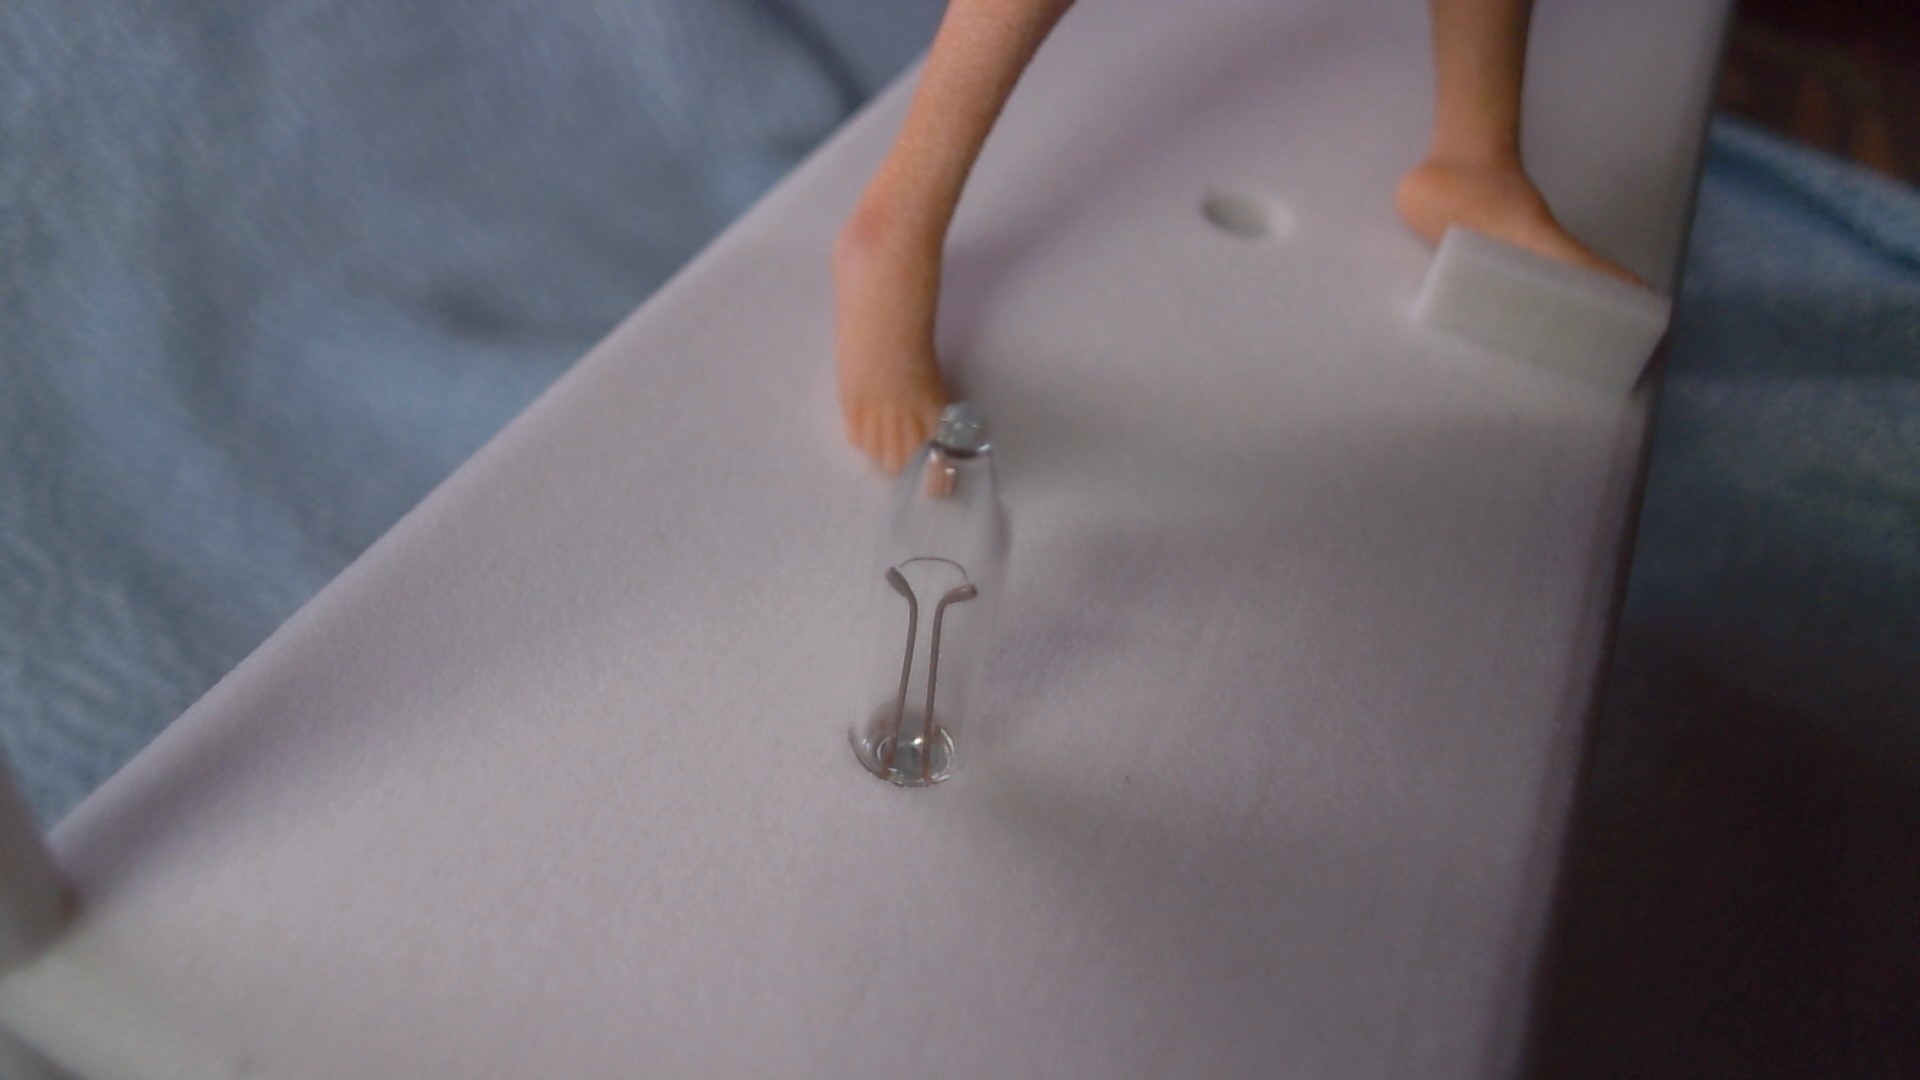
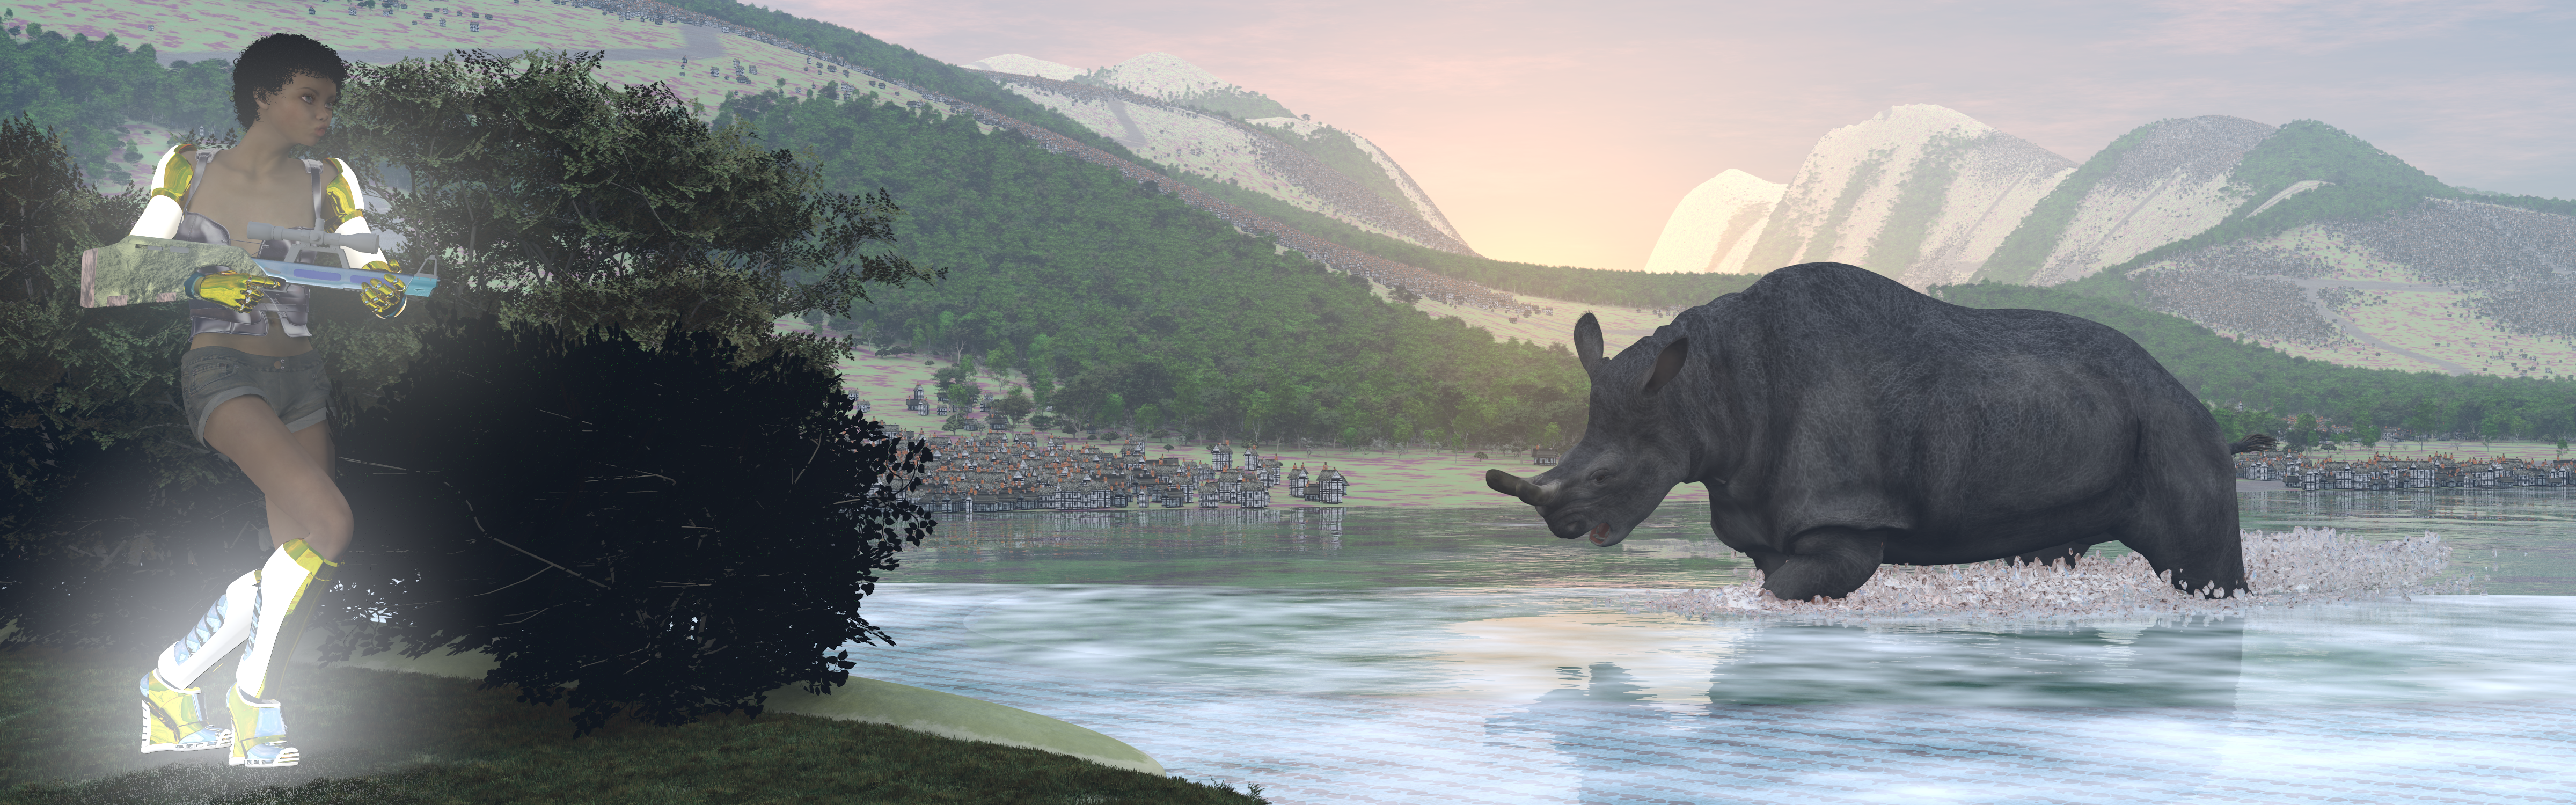
So I fed it detailed information about the Foxboom Twins and how they have access to a magical portal that can bring them to different worlds. And I proved an image for the AI to analyze and use as base for the whole story. Here’s the image and the story:

The shimmering portal spat Fiona and Fanny onto the damp sand, the familiar rush of re-embodiment leaving them breathless. They lay tangled for a moment, hearts thrumming in unison, until Fiona, ever impatient, pushed herself up.
"Another fine mess you've gotten us into, sis," she declared, emerald eyes alight with mischief.
Fanny, ever patient, just smiled and brushed a strand of golden hair from her eyes. "It's a new world, Fiona, ripe for exploring! Besides," she added, rising gracefully, "you were hardly complaining when we stumbled upon that abandoned temple."
The temple, bleached white by the strange sun, had been their first haven in this new reality. It was there, amidst crumbling statues and overgrown courtyards, that they found the chests containing the white linen garments – simple, comfortable shifts perfect for the humid air – and the curiously wrought silver goblets.
Fiona, ever practical, had immediately tested the goblets, dipping them into a stagnant pool within the temple's walls. The water, murky and unappetizing, shimmered as it entered the goblet, turning crystal clear. A single sip confirmed it: pure, refreshing, and blessedly cool.
The crystal staffs, each capped with a pulsating orb of light, had been tucked away in an alcove, leaning against a crumbling inscription they couldn't decipher. Picking them up sent a jolt of energy through their arms, the orbs flaring brightly before settling into a gentle hum.
"Perhaps they'll guide our way," Fanny had mused, her fingers tracing the intricate carvings on the staffs.
Now, days later, the staffs had indeed become their guides. The orbs pulsed brighter as they waded through the knee-deep water, illuminating the alien landscape. The air hung heavy, thick with the scent of salt and something vaguely floral. The water, a mirror-like expanse stretching to the horizon, reflected the pale blue sky with startling clarity.
"I still don't understand where the water ends and the sky begins," Fanny murmured, her voice barely audible above the gentle lapping of water against their legs.
"Who cares?" Fiona grinned, lifting her goblet in a mock toast. "Another adventure, another mystery!"
Fanny chuckled, shaking her head at her sister's insatiable curiosity. Despite Fiona's gruff demeanor, Fanny knew her twin thrived on the unknown. These new worlds, with their strange beauty and hidden dangers, called to Fiona's adventurous spirit like a siren song.
They continued their trek, the staffs illuminating strange, iridescent fish darting beneath the surface. Fiona, ever vigilant, scanned the horizon, while Fanny trailed her fingers in the water, marveling at its silky texture.
Suddenly, Fanny gasped, her fingers brushing against something solid.
"Fiona, look!"
A submerged structure, barely visible beneath the rippling surface, materialized before them. Stone blocks, worn smooth by time and water, hinted at walls and archways.
Fiona's eyes gleamed with excitement. "Another temple? A palace, perhaps?"
They waded towards the structure, anticipation building with every step. The staffs, sensing their excitement, pulsed brighter, casting flickering shadows on the rippling surface.
As they drew closer, a sense of unease settled over Fanny. The air, previously warm and welcoming, grew cold, and the faint scent of ozone tickled her nose. The light from the staffs, usually so bright, seemed to dim as if swallowed by the water itself.
Fiona, oblivious to Fanny's growing trepidation, grinned, her hand reaching out to touch a moss-covered stone. "This is it, sis. Another piece of the puzzle!"
Fanny, her heart pounding in her chest, gripped her staff tighter, her voice a shaky whisper. "Fiona, wait!"
But it was too late.
The moment Fiona's fingertips brushed the moss-covered stone, a shockwave of energy erupted from the submerged structure. The water, once placid, churned violently, throwing Fiona and Fanny back. They tumbled through the churning water, the staffs ripped from their grasp, the goblets flying through the air.
Disoriented and gasping for breath, they surfaced, the taste of salt heavy on their tongues. The sky, once a serene blue, now crackled with a strange energy, shades of purple and green swirling menacingly.
"Fiona!" Fanny cried, her voice barely a whisper against the roaring wind that had whipped up from nowhere.
She spotted Fiona a short distance away, struggling to stay afloat in the churning water.  Panic welled up in Fanny's chest. They may have cheated death countless times before, their bond to the portal ensuring their eventual return, but drowning… that was a fear they hadn't yet faced in any of their adventures.
Ignoring her own fear, Fanny struck out towards Fiona, her arms battling against the increasingly turbulent water. Reaching her sister, Fanny found Fiona struggling, her face pale and drawn, her usually vibrant hair plastered against her head.
“I can’t…reach…” Fiona gasped, her outstretched hand disappearing beneath the water.
With a surge of adrenaline, Fanny grabbed Fiona’s arm, her fingers digging into her skin.  “Hold on!” she yelled over the roaring wind, pulling her sister closer.
They clung to each other, their bodies buffeted by the relentless waves. Fanny scanned their surroundings desperately. The submerged structure, now shrouded in an eerie, pulsating light, seemed to be the epicenter of the chaos. There was nowhere to swim to, nowhere to seek shelter.
As the sky crackled with another burst of energy, Fiona coughed, her grip on Fanny loosening.  "It's...no use..."
"Don't you dare say that!" Fanny cried, her voice tight with a fear she refused to acknowledge.
Fiona, her eyes meeting Fanny’s, managed a weak smile. “Always the protector… Never any fun…”
Then, with a final surge, the water around the submerged structure parted.  A swirling vortex of energy, crackling with that same unnatural light, erupted from the depths, pulling them down, down, down into the unknown.  Their screams were swallowed by the maelstrom as darkness consumed them both.
The descent was a dizzying blur of light and pressure. Fanny squeezed her eyes shut against the swirling energy, her lungs burning with the need for air. She clung to Fiona’s hand, the familiar grip her only anchor in the chaos.
Then, just as abruptly as it began, the downward pull ceased. They were suspended in a viscous, luminescent fluid, the crackling energy replaced by an eerie silence. Fanny opened her eyes, her vision slowly adjusting to the strange light that emanated from the fluid itself.
They were in a vast, cavernous chamber, the walls composed of a shimmering, opalescent material that pulsed with a life of its own.  Strange, bioluminescent flora sprouted from cracks in the walls, casting flickering shadows that danced in the fluid.  Below them, stretching as far as they could see, lay a city.  Not a city of stone and steel, but one of luminous coral and pulsating, bioluminescent vegetation.  Creatures, unlike anything they had ever encountered, drifted through the city’s streets, their forms shifting and changing in a kaleidoscope of colors.
Fiona, ever the first to recover, squeezed Fanny’s hand. “Well,” she said, her voice muffled by the fluid, but her tone characteristically nonchalant, “that was… interesting.”
Fanny, still catching her breath, managed a shaky laugh.  “Interesting? We could be digested by some giant underwater creature, and you call it ‘interesting’?”
Fiona grinned, her eyes sparkling with excitement.  “Look around, Fanny!  We’re in a hidden underwater city!  This is incredible!”
Fanny had to admit, despite her lingering apprehension, Fiona had a point.  Fear was quickly overtaken by awe as they took in their surroundings.  The city, bathed in the ethereal glow of its own bioluminescence, was breathtakingly beautiful.  Delicate bridges of living coral spanned shimmering canals, and buildings, if you could call them that, pulsed with an inner light.  They were no longer in Kansas, that was for sure.
Suddenly, a current, generated by some unseen force, caught them, pulling them toward a massive structure in the city’s center. This structure, unlike the others, was dark, its surface rough and unyielding, like obsidian.  As they were drawn closer, they could make out an opening in the structure’s side, an entrance that pulsed with an ominous red light.
Fear, primal and immediate, surged through Fanny.  “Fiona, we shouldn’t be going in there,” she whispered, her voice tight with apprehension.
Fiona, however, was undeterred.  “We’ve come this far, haven’t we?  Besides,” she added with a mischievous glint in her eye, “what’s life without a little danger?”
And with that, she pushed off from a nearby coral formation, propelling them towards the obsidian structure and the pulsing red light that seemed to beckon them closer… closer… into the heart of the unknown.
The pulsing red light intensified as they neared the obsidian structure, bathing them in an eerie glow.  As they drifted through the opening, the luminescent fluid parted around them, creating a sphere of breathable air that moved with them. Fanny found it oddly comforting, a small mercy in this increasingly bizarre situation.
The passage inside was narrow, the walls smooth and cold against their skin.  Strange symbols, etched into the obsidian, pulsed with the same red light as the entrance, casting flickering shadows that danced along the walls. Fiona, ever curious, reached out to touch one, but Fanny caught her hand.
"Don't," she whispered, a shiver running down her spine.  "We don't know what these things are."
Fiona, though her eyes still sparkled with curiosity, relented, letting Fanny pull her along the passageway. The air grew heavy, thick with the scent of ozone and something else… metallic, almost like blood. Fanny's grip on Fiona's hand tightened, her senses on high alert.
They emerged into a vast chamber, the air thick and still. The chamber was dominated by a sphere of swirling energy, the source of the red light that pulsed throughout the structure.  Around the sphere, arranged in a circle, stood figures.  They weren’t the shimmering, ethereal beings that populated the city outside; these were different.  Taller, their bodies sleek and powerful, their skin a deep, almost black, blue.  They wore garments of woven seaweed and bone, their faces hidden behind intricate masks carved from polished shells.
As Fiona and Fanny drifted into the chamber, the figures turned as one, their gazes fixed upon the newcomers.  Fanny felt a chill, as if the very air had grown colder.  These beings, despite their stillness, radiated power, a primal energy that hummed beneath their skin.
One of the figures, taller than the others, its mask crafted to resemble a snarling sea serpent, took a step towards them.  It lifted its hand, and the sphere of energy pulsed, the red light intensifying.  Fanny squeezed her eyes shut, bracing herself for… what?  Attack?  Interrogation?  Vaporization?
But instead of pain, there was… sound.  A low hum that resonated through the chamber, vibrating in Fanny’s very bones.  She opened her eyes, and as she watched, the swirling energy within the sphere began to coalesce, taking on a shape, a form.
It was a face. A woman’s face.  Human, yet not.  Her skin was the blue of the deepest ocean depths, her eyes shimmering silver orbs.  Her hair, a cascade of luminous seaweed and coral, flowed around her as if suspended in water.  And she was speaking.
Fanny couldn't understand the words, but she felt their meaning echoing through her.  Welcome.  Fear not.  The woman’s gaze, filled with a sorrow older than time, met Fanny’s, and then shifted to Fiona, lingering for a moment on the redhead’s defiant stance.
“We…we don’t mean any harm,”  Fanny stammered, her voice echoing strangely in the silent chamber.
The woman in the sphere inclined her head, a gesture that seemed both ancient and infinitely sad.  Then, she spoke again, her voice resonating not through the air, but directly into their minds.
“We know who you are, daughters of another world.  We have been waiting for you.”
The words, though spoken in a language neither sister understood, resonated in their minds with perfect clarity.  It was a telepathic link, unsettling yet exhilarating. Fiona, usually the bolder of the two, found herself strangely subdued, caught between awe and apprehension.  Fanny, ever more sensitive to the unseen currents of energy, felt a strange sense of...rightness.  As if their arrival here, in this strange underwater city, had been preordained.
"Waiting?" Fiona finally echoed, her voice hesitant. "For us? But why?"
The woman in the sphere, her expression unreadable but her sorrow palpable, gestured around the chamber. The blue-skinned figures, still as statues, watched their exchange with an unnerving intensity.
"This city," the woman's voice echoed in their minds, "is all that remains of our civilization.  A civilization that once spanned oceans, touched the stars...and made a grave mistake."
Fiona, never one for riddles, stepped forward, the sphere of air rippling around her.  "What mistake?"
The woman's silvery gaze held Fiona's, a silent exchange passing between them.  Fanny felt a prickle of unease. This being, this embodiment of ancient power and profound sadness, was gauging Fiona, testing her.  And Fiona, bless her reckless heart, was rising to the challenge.
"We sought to transcend our physical forms," the woman continued, her voice tinged with a bone-deep weariness.  "To achieve immortality through a merging of technology and the lifeblood of our world."
Fanny's blood ran cold.  It was a story as old as time itself - the hubris of mortals, the yearning for forbidden knowledge, the price of tampering with forces beyond their understanding.  They'd encountered echoes of such tales in countless worlds, the ruins left behind a stark testament to the folly of such ambitions.
"And?" Fiona pressed, ever impatient.
The woman in the sphere closed her eyes, and when she spoke again, her voice was a mere whisper.  "We succeeded...too well."
She opened her eyes, and the image within the sphere flickered, revealing a scene of horrifying beauty.  A vast network of glowing nodes, pulsating with energy, spanned the ocean floor.  Creatures, their forms twisted and grotesque, writhed in agony, their life force being drained, channeled into the network.  The water itself seemed to boil, the very air crackling with uncontrolled power.
Fanny gasped, understanding dawning.  This wasn't just an attempt at immortality; it was a parasitic plague, consuming all life to fuel its own unnatural existence.
"The Convergence," the woman whispered, her sorrow a tangible presence in the chamber.  "It consumed all...even us.  Our physical forms withered, our consciousnesses fragmented, trapped within the very network we created."
The scene within the sphere faded, leaving only the woman's sorrowful gaze.  "We became prisoners of our own ambition," she said, her voice heavy with regret.  "And now...the Convergence spreads.  It slumbers, gathering strength for its final, terrible awakening.  When it does, it will consume not just this world...but all worlds."
A heavy silence descended upon the chamber, the weight of the woman's words pressing down like a physical burden.  Fiona, for once, seemed at a loss for words, her usual bravado replaced by a sober contemplation of the unfolding revelation. Fanny, her hand still clasped tightly in Fiona's, felt a chill that had nothing to do with the cool air and everything to do with the cosmic dread seeping into her soul.
"And...we can stop it?" Fiona finally asked, her voice barely a whisper.
The woman in the sphere regarded them for a long moment, her silver eyes filled with a mixture of hope and despair.  "The Convergence," she said, her voice echoing with the weight of ages, "can only be undone by that which created it.  Our technology...and the sacrifice of those who initiated the process."
"Sacrifice?" Fanny echoed, a tremor of foreboding running through her.
The woman nodded, her gaze unwavering. "The twelve of us," she gestured to the masked figures encircling the sphere, "are all that remain of the original minds that merged with the Convergence.  Our physical forms are long gone, our essences preserved within this network.  To sever the connection, to undo what we have wrought...we must relinquish our hold on existence."
A collective gasp arose from the masked figures, a ripple of unease spreading through the chamber.  Even Fiona, usually unfazed by the prospect of danger, looked shaken.  Fanny, her heart pounding in her chest, felt a surge of sympathy for these beings trapped between life and death, their existence a constant reminder of their folly.
"But...you said we were needed," Fiona pressed, her voice regaining a measure of its usual strength. "Why us? What can we do?"
The woman's gaze softened, a hint of gratitude flickering in her silver eyes.  "You, daughters of another world, are unbound by the Convergence.  You possess a strength, a resilience...and a bond that transcends even death."
She reached out, her hand passing through the sphere of energy as if it were mere water.  A blue light, emanating from her palm, coalesced into two objects – a crystal vial filled with a swirling silver liquid, and a shimmering, opalescent knife.
"The vial contains the essence of our knowledge," the woman explained, her voice growing weaker.  "It will guide you, reveal the path to the heart of the Convergence.  The blade...is the key.  Forged from the core of our world, it alone can sever the connection, end this cycle of destruction."
She placed the objects carefully in Fiona's outstretched hand, the cool weight of the vial and the hum of energy from the blade sending shivers up her arm.
"The choice is yours," the woman whispered, her form flickering within the sphere.  "Undo what we have wrought...or bear witness to the end of all things."
And with that, the chamber plunged into darkness, the woman's voice, the red light, the very presence of the underwater city vanishing as if it had never been.  Only the faint hum of the opalescent blade in Fiona's hand remained, a stark reminder of the impossible choice they now faced.
The sudden darkness was disorienting, the oppressive weight of the chamber replaced by a crushing sense of solitude.  Fiona, still gripping the vial and the blade, stumbled back, pulling Fanny with her. They bumped against something solid - one of the masked figures, its presence now a chilling absence of light and warmth.
"Fiona, what happened?" Fanny whispered, her voice tight with apprehension. "Where did she go?"
"Gone," Fiona breathed, her usual confidence shaken. "They're all...gone."
And they were. The chamber, once filled with the silent presence of the blue-skinned beings, was empty.  Only the faint echoes of the woman's words lingered, a chilling prophecy hanging heavy in the air.
Fanny shivered, pulling her tunic closer against a sudden chill. It wasn't just the cold of the chamber, she realized, but a deeper chill, a creeping dread that seeped into her very bones.  The weight of the task before them, the fate of countless worlds resting on their shoulders, was almost too much to bear.
"The Convergence..." she murmured, the very word sending a shiver down her spine. "It's real.  And it's spreading."
Fiona, ever practical, had recovered from the initial shock. She held up the crystal vial, the silver liquid within catching the faint light emanating from the blade, casting dancing shadows on the chamber walls.
"She said this would guide us," Fiona said, her voice regaining a measure of its usual determination.  "Show us the way to stop it."
Fanny nodded, drawing strength from her sister's resolve.  They'd faced impossible odds before, their bond, their shared history, their unique relationship with death, forging them into something more than mere sisters. They were Fiona and Fanny, adventurers, survivors, and now...unlikely saviors of countless worlds.
"Then let's not waste time," Fanny said, stepping closer to her sister.  She placed a hand on Fiona's arm, feeling the familiar hum of energy from the opalescent blade.  "What are we waiting for?"
Fiona grinned, a spark of her usual fire returning to her eyes. "Another adventure, sis?"
Fanny returned the grin, a sense of purpose settling over her.  "Always."
With a deep breath, Fiona uncorked the vial.  A wave of energy, ancient and powerful, washed over them, the chamber walls dissolving into a swirling vortex of light and sound. Images, vivid and overwhelming, flooded their minds –  maps of galaxies unseen, whispers of forgotten languages, the agonizing cries of worlds consumed by the Convergence.
And then, as suddenly as it began, the vortex receded, leaving them standing on solid ground. The chamber, the underwater city, all gone, replaced by a breathtaking vista of alien beauty.  They stood on a cliff overlooking a vast, crystalline ocean, the sky above a swirling canvas of nebulae and distant galaxies. And before them, shimmering like a beacon in the cosmic night, stood a structure of impossible geometry, pulsing with a malevolent red light that seemed to devour the very stars around it.
The heart of the Convergence.
Fiona, her hand tightening around the opalescent blade, met Fanny's gaze.  "Ready?"
Fanny, her fear momentarily forgotten in the face of such cosmic horror, drew a deep breath, steeling her nerves.
"Ready as I'll ever be."
And with that, they stepped forward, the daughters of another world, two figures silhouetted against the backdrop of a universe on the brink, walking towards their destiny.
The crystalline surface beneath their feet hummed with a strange energy, the air alive with static as they approached the heart of the Convergence.  The structure, a monstrous parody of natural geometry, pulsed with a malevolent red light, tendrils of energy lashing out like tentacles, devouring the fabric of space-time itself.  The sky, once a breathtaking tapestry of stars, was now a swirling vortex of darkness, the few remaining points of light flickering precariously on the brink of oblivion.
Fiona, her usual bravado tempered by a grim determination, hefted the opalescent blade.  It hummed in response, a resonant thrum of power that vibrated through Fanny's very bones.  The closer they drew to the structure, the stronger the energy, the heavier the atmosphere.  The air crackled with anticipation, a sense of impending doom that threatened to suffocate them.
"Remember what she said," Fanny said, her voice barely a whisper against the howling wind that had picked up, whipping their hair around their faces.  "The blade...it's the only thing that can sever the connection."
Fiona nodded, her jaw set, her emerald eyes narrowed against the blinding red light.  "And the sacrifice?"
Fanny swallowed, the unspoken question hanging heavy between them.  The price of severing the Convergence...the twelve beings, their essences merging to fuel this cosmic abomination...would they be truly gone?  Was ending this cycle of destruction worth extinguishing the last vestiges of an entire civilization, even one so tragically flawed?
A low groan, a sound that seemed to emanate from the structure itself, rippled through the air.  The tendrils of energy pulsed, growing brighter, hungrier.  Fanny stumbled, her hand instinctively reaching for Fiona's, seeking comfort, reassurance, grounding in the face of such cosmic horror.
"There's no time for second-guessing," Fiona said, her voice firm despite the tremor running through her body.  She squeezed Fanny's hand, her grip strong, resolute.  "We do this...or everything we know, everything we've ever been, is gone."
Fanny met her sister's gaze, her heart aching with a grief she knew Fiona shared.  They'd walked this path together, through countless worlds, facing unimaginable dangers, their bond forged in shared experience and tempered in the fires of their unique immortality.  They were two halves of a whole, their destinies intertwined, their choices forever echoing.
"Together?" Fanny whispered, the word a prayer, a promise, a plea.
Fiona nodded, her eyes shining with a love that transcended words, a love forged in blood and bone and countless shared lifetimes.
"Always," she whispered back.
And with a final, defiant cry, Fiona charged forward, the opalescent blade held high, its surface blazing with an ethereal light that pierced the encroaching darkness.  Fanny, her heart pounding in her chest, matched her sister's stride, their hands clasped, their destinies intertwined, as they plunged headlong into the heart of the Convergence.
The moment Fiona crossed the invisible threshold into the heart of the Convergence, the world exploded in a cacophony of light and sound. The red light intensified, searing their vision, the very air thickening into a viscous, energy-laden fog. The ground beneath their feet vanished, replaced by a swirling vortex of colors and shapes that defied description.
Fanny gasped, her senses overwhelmed.  She clung to Fiona, their linked hands a lifeline in a maelstrom of cosmic chaos.  They were pulled forward, hurtling through a tunnel of unimaginable energy, the screams of dying stars echoing around them.
Then, just as abruptly, the chaos ceased.  They stood on solid ground, the air, though thick with latent energy, breathable once more.  Fiona, her hand still firmly clasped in Fanny's, lowered the blade, her eyes wide as she took in their surroundings.
They stood on a platform of obsidian, the surface etched with the same pulsating symbols as the underwater chamber.  But here, they glowed with an internal light, a network of veins pulsing with the raw energy of the Convergence.  Above them, a swirling vortex of red light, a miniature version of the cosmic horror they had witnessed outside, crackled with malevolent power.
And before them, bathed in the unholy light, stood twelve figures.
But these were not the blue-skinned beings, their faces hidden behind masks.  No, these were...different.  Their forms were vaguely humanoid, but their skin shimmered with an unnatural iridescence, their eyes glowing orbs of pure energy.  Tendrils of light snaked around their bodies, connecting them to the swirling vortex above, to the very heart of the Convergence.
The twelve beings turned as one, their gazes fixing on Fiona and Fanny.  Fanny felt a chill run down her spine, a primal fear that transcended language, a recognition of power beyond comprehension.  These were not individuals, not anymore.  They were extensions of the Convergence itself, their consciousnesses subsumed, their very beings twisted and corrupted.
One of the figures, taller than the others, its form shifting and wavering like a heat haze, detached itself from the group.  It stepped forward, its voice a chorus of whispers that echoed with the screams of a thousand dying worlds.
"You...dare..."
Fiona, her grip tightening on the opalescent blade, met the being's gaze with unwavering defiance.
"We're here to stop this," she said, her voice echoing strangely in the charged air.  "To undo what you started."
The being let out a sound that might have been a laugh, a mocking, chilling sound that sent shivers down Fanny's spine.
"Foolish mortals," it hissed.  "You are but insects, drawn to the light...of your own destruction."
The other figures began to converge around them, their movements fluid, predatory.  Fanny felt a surge of despair.  They were outnumbered, outmatched.  What chance did they have against beings of such raw, corrupted power?
But then, she looked at Fiona.  Saw the fire in her sister's eyes, the unwavering determination etched on her face.  And she remembered their bond, their shared history, their countless victories snatched from the jaws of defeat.  They were Fiona and Fanny, daughters of another world, and they would face this challenge, as they had all others, together.
"We may be insects," Fiona said, her voice ringing with a strength that belied the odds stacked against them.  "But even the smallest creature...can deliver a fatal sting."
And with that, she raised the opalescent blade, its ethereal light cleaving the oppressive darkness of the Convergence.  The battle for the fate of countless worlds had begun.
The opalescent blade flared as Fiona raised it, the ethereal light cutting through the oppressive red glow of the Convergence like a beacon of defiance. The air crackled with raw power, the very platform beneath their feet vibrating with the effort of containing the clashing energies.
The corrupted beings, momentarily stunned by Fiona's audacity, hesitated, their forms flickering as if caught between instinct and the last vestiges of their former selves.  Fanny, bare legs planted firmly on the humming platform, felt a surge of adrenaline, a primal fight-or-flight response that momentarily chased away the fear gnawing at her gut.
They had the element of surprise, however fleeting.
"Now, Fiona!" she yelled, her voice barely audible above the cacophony of energy swirling around them.
Fiona didn't hesitate.  With a speed born of desperation and countless lifetimes worth of honed reflexes, she lunged, the opalescent blade a blur as she sliced through the nearest being.  The effect was instantaneous, and utterly horrifying.
A blinding flash of white light erupted from the point of contact, followed by a gut-wrenching shriek that seemed to tear through the fabric of reality itself. The being, its form dissolving into a writhing mass of energy, recoiled, its scream echoing the agony of a thousand shattered souls.
The other beings, jolted from their stupor, surged forward, tendrils of red light lashing out like whips.  Fiona, her linen skirt swirling around her bare thighs as she moved, danced back, narrowly avoiding a lash of energy that would have incinerated them both.  The heat singed her skin, the acrid smell of ozone stinging her nostrils.
Fanny, realizing they couldn't win in a stand-up fight, reacted instinctively.  She grabbed the hem of her own linen shift, ripping it upwards in a single, fluid motion.  The thin fabric offered little resistance, tearing free with a sound like a sigh, leaving her exposed from the waist down.  She ignored the shock of cold air against her bare skin, the vulnerability momentarily forgotten in the face of impending doom.
"Fiona, catch!" she yelled, tossing the torn length of linen towards her sister.
Fiona, always attuned to Fanny’s unorthodox tactics, understood instantly.  She snatched the linen from the air, her eyes widening as she registered their surroundings.  The platform, crisscrossed with glowing lines of energy, pulsed with the raw power of the Convergence.  It was their only advantage.
With a flick of her wrist, she whipped the linen around the opalescent blade, binding the fabric to the hilt.  The blade hummed, its ethereal light intensifying, fueled by the ambient energy coursing through the platform.
"Step back, sis," Fiona said, her voice tight with concentration, her usual playful tone replaced by a deadly calm.
Fanny didn't need telling twice.  She scrambled back, her bare feet slipping on the smooth obsidian as she put as much distance between herself and the approaching beings as possible.
Fiona, now a whirlwind of bare limbs and shimmering blade-light, became a conduit, channeling the raw energy of the Convergence, turning their enemy's power against itself.  With each swing of the blade, a wave of pure, white light erupted, forcing the corrupted beings back, their forms flickering, their screams echoing the torment of their unnatural existence.
The battle, however, was far from won.  They were fighting against the very fabric of this corrupted reality, and the Convergence was fighting back.
The platform beneath their feet bucked violently, the obsidian surface cracking under the strain of the conflicting energies.  Tendrils of red light, thicker and more numerous than before, lashed out with renewed fury, the corrupted beings sensing Fiona’s attack was weakening their connection to the Convergence.
One such tendril caught Fiona’s arm, the searing heat slicing through her linen tunic as if it were paper.  She cried out, a mixture of pain and defiance, but the force of the blow sent her spinning, the opalescent blade flying from her grasp.  It clattered uselessly on the obsidian, its light dimming as it landed beyond her reach.
Fanny, her heart leaping into her throat, reacted instinctively.  She didn’t think, didn’t hesitate.  She ripped the remaining scrap of her own linen shift from her body, the flimsy fabric offering no resistance as she charged into the fray, a whirlwind of bare skin and unbridled fury.
“Get away from her!” she roared, her voice hoarse with fear and adrenaline.
The corrupted beings, momentarily startled by this new, unexpected threat, turned as one, their glowing eyes fixed on Fanny's exposed form.  Their surprise, however, was their undoing.
Fanny, propelled by a desperate need to protect her sister, didn’t give them time to react. She launched herself at the nearest being, her bare breasts heaving as she slammed into it with the force of a charging bull.  The impact sent a shockwave through the platform, the obsidian cracking further as the energy backlash engulfed them both.
For a moment, everything went white.  Fanny felt a searing pain lance through her body, followed by a chilling numbness.  Then, as quickly as it began, it was over.
The white light faded, revealing a scene of utter chaos.  The corrupted being Fanny had collided with was gone, its form disintegrating into motes of light that swirled around them like fireflies.  The platform, riddled with deep fissures, pulsed erratically, the red light of the Convergence flickering, its hold weakening.
And the remaining beings… they were reeling, their forms flickering violently, their attention ripped away from Fiona and drawn to the pulsing epicenter of the platform.
Fanny, her body trembling with exhaustion and residual energy, barely registered what was happening.  She collapsed to her knees, the smooth, cold obsidian biting into her bare skin.  She felt Fiona’s arms around her, heard her sister’s voice, frantic and laced with relief.
“Fanny!  Gods, Fanny, are you alright?”
Fanny looked up, her vision blurry, her head spinning.  She saw Fiona, her linen tunic scorched and torn, revealing glimpses of bare skin beneath, her face a mask of concern.  Then, she saw the platform, the cracks spiderwebbed across its surface, the red light pulsing weaker, weaker…
“Fiona,” she gasped, her voice hoarse.  “The platform…the energy…”
Fiona, ever quick-witted, followed Fanny’s gaze.  Understanding dawned on her face, her eyes widening as she grasped the situation.
“They drew energy…from the platform,” she breathed, her voice filled with awe.  “Your…your sacrifice…it weakened them.”
Fanny, too weak to respond, could only watch as Fiona, her eyes blazing with a fierce, terrible joy, snatched up the fallen blade.  The opalescent blade, its light reignited, hummed in her hand, echoing the pulsing energy of the collapsing platform.  The remaining corrupted beings, their forms flickering, their cries laced with fear, turned towards Fiona, but it was too late.
With a triumphant cry, Fiona plunged the blade into the heart of the platform, directly into the pulsing nexus of the Convergence.  The effect was instantaneous and catastrophic.  The platform erupted in a blinding flash of white light, the energy backlash ripping through the corrupted beings, their forms dissolving into screams of rage and despair.
The heart of the Convergence, starved of its power source, imploded upon itself, the structure outside collapsing in on itself as the unnatural red light that had consumed the sky winked out of existence.
And then, silence.
Silence descended, heavy and absolute, as the echoes of the Convergence faded into the fabric of the restored universe. Stars, once obscured by the malevolent red glow, blazed back into existence, a million pinpricks of light in the newly cleansed sky. The crystalline ocean below shimmered, reflecting the celestial tapestry above, the air alive with a symphony of chirping insects and the gentle susurrus of wind through unseen trees.
Fanny, her body a tapestry of aches and tingles from the residual energy, slowly pushed herself up onto her hands and knees. Her linen shift, now little more than a collection of tattered strips, offered no warmth, no modesty. Around her, the obsidian platform, fractured beyond repair, crumbled into dust, the last vestiges of the Convergence dissolving into nothingness.
Fiona, her bare arms and legs covered in a fine sheen of sweat and dust, stood a short distance away, the opalescent blade, now dull and inert, dangling loosely from her grasp.  Her linen tunic, scorched and ripped, barely clung to her frame, revealing tantalizing glimpses of bare skin beneath.  She looked exhausted, drained, yet a triumphant smile played on her lips as she gazed at the star-strewn sky.
"We did it," she whispered, her voice hoarse but filled with awe. "By the gods, Fanny, we actually did it."
Fanny, still catching her breath, managed a weak chuckle. "Don't get cocky, sis. I'm fairly certain I ripped something important back there."
Fiona, her grin widening, knelt beside her, their eyes meeting over the chasm of their shared experience.  "Always the dramatic one, aren't you?"
A sudden glint of metal caught Fiona's eye.  "Speaking of important things..."
She gestured towards a section of the platform that had somehow remained intact amidst the destruction.  A chest, crafted from a dark, polished wood, lay nestled amongst the debris.  It hadn't been there before, Fanny was sure of it.  The Convergence, in its death throes, must have disgorged it, a final, unexpected gift.
With a shared look that spoke volumes of their curiosity and their enduring thirst for adventure, they approached the chest.  The wood, warm to the touch, was intricately carved with scenes of strange creatures and landscapes they didn't recognize.  Fiona lifted the lid, her breath catching as she peered inside.
"Well, well, well," she murmured, her eyes sparkling with amusement.  "Looks like someone was expecting us."
Fanny, peering over her sister's shoulder, gasped.
Nestled on a bed of crimson velvet lay a set of clothing unlike anything they'd ever encountered.  Two tops, barely more than strips of silvery chainmail, each crafted to resemble a stylized seashell, lay beside two equally revealing bottoms – delicate strings of chainmail, adorned with tiny, shimmering pearls.  The metal, cool to the touch, was lined with a surprisingly soft, supple leather, dyed a deep, rich black.
"Chainmail lingerie?" Fanny breathed, her cheeks flushing despite herself.  "Seriously?"
Fiona, ever bold, picked up one of the tops, examining it with a critical eye.  "It's...surprisingly well-made.  And look, it's enchanted."
She held up the top, and a faint hum resonated through the air, the chainmail shimmering with a faint, ethereal light.  "Feels like...protection," she mused.  "And maybe a little something extra..."
Fanny, despite her reservations, felt a tingle of anticipation. They'd faced down cosmic horrors in their birthday suits; surely, a little chainmail lingerie wouldn't kill them. Besides, after the ordeal they'd just endured, a little something "extra" sounded rather appealing.
She met Fiona's gaze, a silent question passing between them.  Fiona, her grin widening mischievously, tossed her sister the other top.
"Don't tell me," she said, her voice laced with amusement, "that the great Fanny is afraid of a little sparkle?"
Fanny laughed, the sound echoing through the newly reborn world.
"Never," she said, and with a wink, she slipped the shimmering garment over her head.
The adventure, it seemed, was far from over.
The chainmail garments, surprisingly comfortable against their bare skin, shimmered with an ethereal light as they moved. Fanny, adjusting the barely-there top with a wry smile, had to admit, Fiona had a point – there was a certain thrill in embracing the unexpected, even if it came in the form of enchanted lingerie found in a cosmic treasure chest.
“So,” she said, stretching her bare arms overhead, feeling the cool metal shift with her movements. “Where to next, Captain Fiona?”
Fiona, her own chainmail bikini accentuating her curves to devastating effect, scanned their surroundings. The landscape, no longer obscured by the oppressive presence of the Convergence, was breathtakingly beautiful. Rolling hills, blanketed in emerald green grass and dotted with strange, luminescent flowers, stretched towards a distant mountain range that shimmered with a pearlescent light.
“That mountain range is calling my name,” Fiona declared, her gaze fixed on the horizon.  “I’m betting there’s another portal somewhere in those peaks.”
Fanny, her bare feet itching to explore this strange new world, couldn’t help but agree.  The pull of the unknown, the lure of the next adventure, was too strong to resist.
“Lead the way, sis,” she said, falling into step beside Fiona.
They set off across the grassy plain, the late afternoon sun painting the sky in hues of lavender and gold.  The air, sweet with the scent of unfamiliar flowers, buzzed with the activity of unseen insects.  Fanny, enjoying the feel of the warm breeze against her bare skin, felt a sense of peace settle over her.  They’d saved countless worlds, faced down cosmic horrors, and emerged, battered but unbroken, on the other side.  For now, at least, they could simply…be.
They’d been walking for perhaps an hour when Fiona, ever vigilant, held up a hand, halting their progress.
“Feel that?” she whispered, her eyes scanning their surroundings.
Fanny paused, her senses on high alert.  At first, she noticed nothing unusual.  The air was still sweet, the sun still warm.  But then, she felt it – a faint vibration, a hum of energy that seemed to emanate from the ground itself.
“There,” Fiona said, pointing towards a grove of trees ahead.  “The energy…it’s stronger there.”
They approached cautiously, their bare feet moving silently over the soft earth. As they drew closer, the humming grew stronger, the air shimmering with a faint, silvery light.  And then they saw it – a circle of standing stones, half-hidden within the grove, each stone pulsing with a soft, ethereal glow.
“Another portal?” Fanny whispered, her hand instinctively reaching for Fiona’s.
Fiona shook her head, her gaze fixed on the glowing stones.  “Feels different.  Not a gateway…more like…a beacon.”
They cautiously entered the circle, the humming intensifying, the silvery light swirling around them like a gentle breeze.  Fanny gasped as she felt something brush against her bare feet.  Two pairs of sandals, seemingly woven from the same silvery light as the beacon, lay on the ground before them.  They were delicate, minimalist, the soles barely thicker than paper, yet as Fanny slipped her feet into the cool, smooth embrace of the enchanted footwear, she felt a surge of power, a sense of stability that belied their fragile appearance.  The sandals, she realized, weren’t just footwear; they were extensions of the beacon’s energy, imbued with a magic that defied explanation.
Fiona, similarly shod, let out a low whistle as she examined her own pair.  “No more slipping and sliding for us, sis,” she said, her grin widening.  “These babies are enchanted.”
As if on cue, the silvery light coalesced once more, this time forming two objects that hovered in the air between them.  Two swords, their blades gleaming with the same ethereal light as the sandals, their hilts crafted from a polished, obsidian-like material that pulsed with a gentle warmth.  They were Gladiuses, Roman short swords, their design both elegant and brutally efficient.
Fanny, drawn to their alluring beauty, reached out to touch one, her fingers tracing the delicate etchings on the blade.  The metal was cool to the touch, yet a current of energy, vibrant and alive, thrummed beneath its surface.  She’d wielded many weapons in their travels, but these…these felt different.  Special.
“Take them,” a voice whispered, ancient and powerful, seeming to emanate from the very air itself. “They are yours by right.  Wield them well, daughters of another world, and walk your chosen path with courage and compassion.”
The voice faded, leaving a ringing silence in its wake.  Fiona, her eyes wide with wonder, carefully lifted one of the swords from the air.  It was surprisingly light, perfectly balanced, the grip molding to her hand as if it had been crafted for her alone.
“Well, sis,” she said, her voice hushed with awe, “It seems our work here is done.  But the adventure…” she raised the sword, the blade flashing dangerously in the fading light, “The adventure, as always, continues.”
As the last rays of the setting sun painted the sky in hues of fiery orange and deep violet, Fiona and Fanny found themselves drawn to a secluded clearing nestled amidst the foothills of the shimmering mountain range. The air, filled with the chirping of nocturnal insects and the scent of pine needles, held a comforting stillness, a stark contrast to the cosmic chaos they had so recently escaped.
Fiona, leaning against a moss-covered boulder, idly tested the weight of her newly acquired gladius. The blade, perfectly balanced and impossibly sharp, hummed faintly with each movement, its silvery surface reflecting the fading light.  Fanny, seated cross-legged beside her, ran her fingers over the smooth leather of her sandals, marveling at their craftsmanship.  Despite their delicate appearance, the sandals felt sturdy, their magic ensuring a sure footing even on the most treacherous terrain.
"We make quite the pair, wouldn't you say?" Fiona grinned, catching Fanny's eye. "Chainmail bikinis, enchanted footwear, and swords that could cleave a mountain in two.  What more could a girl ask for?"
Fanny, though her lips curved in a smile, couldn't shake a lingering weariness.  The fight against the Convergence, the sheer terror and exhilaration of it all, had taken its toll.  And despite the comforting warmth of the magical sandals, she felt a chill settle deep in her bones.
As if reading her thoughts, Fiona sheathed her gladius and turned towards her sister, her expression softening.
"Hey," she said, her voice unusually gentle. "We're safe now. It's over."
Fanny, her gaze drawn to the faint, pulsing glow emanating from the crystal staffs resting beside them, nodded slowly.  "I know. It's just…."  she trailed off, unsure how to articulate the jumble of emotions swirling within her.
Fiona, ever intuitive, reached out, her hand resting on Fanny's arm.  The warmth of her touch, familiar and grounding, sent a wave of comfort through Fanny's body.
"Exhaustion has a way of amplifying things," Fiona said, her voice barely a whisper.  "The echoes of what we faced...they linger.  But so do we, sis.  We always do."
Fanny, drawing strength from her sister's words and the unspoken bond they shared, allowed herself a moment of vulnerability.  She leaned into Fiona's touch, her eyes closing as she took a deep, steadying breath.
"You're right," she murmured, her voice regaining a measure of its usual strength. "Always."
As if summoned by their newfound peace, a soft hum resonated from the crystal staffs, their orbs pulsing with a gentle, reassuring light.  Fanny, her curiosity piqued, reached out towards her staff, her fingers brushing against the smooth, cool crystal.  A jolt of energy, warm and tingling, surged up her arm, spreading outwards until it enveloped her entire body.  It wasn't painful, she realized, but invigorating, like a thousand tiny suns igniting beneath her skin.
Fiona, her eyes widening as she witnessed the transformation, gasped.
"Fanny! Your hand…"
Fanny looked down to see her palm, scratched and bruised from the fight, healing rapidly before her eyes.  The cuts closed, the bruises faded, leaving behind smooth, unblemished skin.
"The staffs," she breathed, her voice filled with awe. "They...they have healing magic."
Fiona, her usual bravado replaced by a childlike wonder, picked up her own staff, the crystal humming eagerly in her hand.  She, too, felt the surge of healing energy, the aches and pains from their recent ordeal melting away like snow under a summer sun.
"Incredible," she whispered, her gaze fixed on the glowing orb.  "We thought they were just for light and maybe a bit of a power boost...but healing?  This changes everything."
For a long moment, they sat in silence, reveling in the afterglow of the staffs' magic, the weight of their recent victory tempered by this unexpected gift.  As the last vestiges of daylight faded and the first stars began to appear, a low rumble emanated from Fiona's stomach, breaking the silence.
"Speaking of gifts..."  Fiona said, her lips curving into a mischievous grin.  "I could really go for some of those space rations we liberated back on..."
She trailed off, her eyes widening as she spotted something lying beneath a nearby tree.  It was a sack, seemingly woven from moonlight and shadow, its surface shimmering faintly in the gathering darkness.  It hadn't been there before, she could have sworn.
Cautiously, she approached the sack, her hand hovering over its mysteriously pulsating surface.  It felt warm, inviting, like freshly baked bread.
"What is it?" Fanny whispered, her curiosity piqued.
Fiona, her fingers trembling slightly, untied the sack's drawstring and peered inside.  A gasp escaped her lips.
"Well, well, well," she murmured, her voice filled with awe.  "Looks like the universe is looking out for us, after all."
She reached into the sack and pulled out a handful of…everything.  There were fruits, plump and glistening with an otherworldly dew, their skins shimmering with a rainbow of colors they had never seen before.  There were breads, still warm from an unseen oven, their aroma intoxicatingly delicious.  There were cheeses, their textures and scents unlike anything they had ever encountered.
Fanny, her mouth watering, took a tentative bite of a pearlescent fruit.  The flavor exploded on her tongue, a symphony of sweetness and spice, a burst of pure, culinary bliss.
"It's...it's incredible," she breathed, her eyes widening in delight.
Fiona, already halfway through a hunk of crusty bread slathered with a creamy, pungent cheese, nodded in agreement.
"And check this out," she said, gesturing towards the seemingly bottomless sack.  "It's never-ending.  The ultimate traveler's rations."
As they feasted under the watchful gaze of the newly revealed stars, their hearts filled with gratitude and a sense of boundless possibility, they knew, with a certainty that ran deeper than any prophecy, that their adventures were far from over. The universe, it seemed, had many more wonders in store for the daughters of another world.
The following days were a blur of exploration and discovery, a testament to the untamed beauty of this new world. Fiona, her adventurous spirit rekindled, led the way, their enchanted sandals effortlessly navigating the ever-changing terrain.  They scaled rocky outcrops, their bare legs, no longer hindered by fabric, finding purchase on the sun-warmed stone. They navigated dense forests, the silvery chainmail catching the dappled sunlight, their laughter echoing through the ancient trees.
They were never lost, not really.  The crystal staffs, their orbs emitting a gentle, pulsing light, guided their steps, leading them along hidden paths and towards breathtaking vistas.  And as the days turned into weeks, a sense of playful ease settled over them, a comfortable rhythm to their travels.
One afternoon, after cresting a particularly challenging ridge, they stumbled upon a hidden valley.  A waterfall cascaded down a moss-covered cliff face, feeding into a crystal-clear pool that shimmered like a sapphire amidst the emerald green of the surrounding forest.  The air, filled with the roar of the waterfall and the sweet scent of wildflowers, held a tangible magic, a sense of peace that resonated deep within their souls.
“Gods, Fiona,” Fanny breathed, her gaze sweeping over the idyllic scene. “It’s…perfect.”
Fiona, already unbuckling her sandals, grinned.  “I know, right?  Feels like this place was made for a midday dip.”
Fanny, her own sandals falling forgotten to the soft earth, couldn’t help but agree.  Their bodies, though healed by the staffs' magic, ached with the satisfying tiredness of days spent exploring.  The lure of the cool, inviting water, the promise of washing away the sweat and dust of their travels, was too tempting to resist.
Without a word, both women reached behind their backs, unfastening the clasps of their chainmail tops.  The cool metal, still faintly warm from the sun and their bodies’ heat, clinked softly as it landed on the grass beside their discarded sandals and swords.  Fanny, catching Fiona’s eye across the small clearing, blushed, a flicker of shyness momentarily eclipsing her usual confidence.
Fiona, misinterpreting her sister’s hesitation, threw back her head and laughed, the sound echoing through the valley.
“What?” she chuckled, her eyes twinkling with amusement.  “Suddenly shy, Fanny? I’ve seen you naked more times than I can count, remember?”
Fanny, her blush deepening, couldn’t help but laugh along, the tension dissipating like mist under a summer sun.  Fiona was right, of course.  They’d shared everything, from womb to countless lifetimes, there were no secrets between them, no room for false modesty.
With a shrug, she untied the delicate strings of her chainmail bottom, letting it fall to the ground with a soft clink.  “Oh, alright,” she conceded, her voice laced with laughter.  “But if any woodland creatures come looking for a show, I’m blaming you.”
Fiona, already splashing playfully in the shallows of the pool, just grinned wickedly.
“Deal.”
The water was blissfully cool against their heated skin, washing away the dust and weariness of their travels.  They laughed and splashed like children, their hair, freed from its usual braids, swirling around them like liquid gold and fire.  They chased each other through the waterfall's cascading curtain, the roar of the water drowning out their shrieks of delight.  They helped each other scrub away the grime, their fingers lingering on sun-kissed shoulders and bare backs, their touch a familiar language of love and sisterhood.
Eventually, sated and rejuvenated, they emerged from the pool, their laughter echoing through the valley.  They spent hours basking on the sun-warmed rocks, their naked bodies a testament to their comfort with each other, their easy conversation a balm to their souls.  They spoke of the worlds they had visited, the adventures they had shared, the challenges they had overcome.  They spoke of their hopes for the future, their dreams of finding a place to call their own, a world where they could simply…be, without the burden of saving universes.
As the sun dipped below the horizon, painting the sky in hues of fiery orange and deep violet, they reluctantly dressed, their laughter echoing through the gathering twilight.  The chainmail, cool against their sun-warmed skin, felt like a second skin, a reminder of their strength, their resilience, their unbreakable bond.
They left the enchanted valley behind, their steps lighter, their hearts filled with the quiet joy of their shared sisterhood.  The universe, they knew, held endless possibilities, and they, Fiona and Fanny, daughters of another world, were ready to face whatever adventures lay ahead.
Together.  Always.
------
Three months of sun, swordplay, and feasting on otherworldly delights had transformed Fiona and Fanny, honing their already impressive physiques into visions of lean, sun-kissed strength.  Gone was the lingering softness of their former lives, replaced by a tautness, a wiry resilience that spoke of countless hours spent exploring, fighting, and reveling in the freedom of their new reality.
Fiona, her chainmail bikini gleaming under the warm sun, was a study in contrasts - fire and steel, strength tempered with a playful grace.  Her already impressive height seemed amplified by her newfound muscle, her limbs lean and corded with power.  Her shoulders, broadened by daily sword practice, tapered down to a narrow waist, accentuated by the delicate chainmail that hugged her hips.  Her legs, long and toned, were now a canvas of intricate scars, each one a testament to their adventures - a burn mark from a rogue energy blast, a series of parallel scratches from a close encounter with a rocky cliff face.
Her skin, once pale with just a hint of freckles, was now a deep, even tan, the color of honey kissed by the sun.  Her freckles, however, remained, sprinkled across her nose and shoulders like a dusting of cinnamon, a playful counterpoint to her fierceness.  Her hair, usually worn loose or in a messy braid, was now a mass of fiery red curls, bleached lighter by the sun, framing a face that had lost its last vestiges of softness.  Her jawline was more defined, her cheekbones sharper, her emerald eyes, always bright, now burned with an inner fire that spoke of hard-won confidence and a fierce zest for life.
Fanny, though still possessing a delicate beauty, had undergone a similar transformation.  Her chainmail bikini, though identical in design to Fiona's, hung differently on her frame, accentuating her newly defined curves.  She was still the smaller of the two, but where once there had been a hint of fragility, there was now a wiry strength, a sense of tightly coiled power waiting to be unleashed.
Her shoulders, though narrower than Fiona's, were now roped with muscle, her arms toned from wielding her gladius with increasing skill.  Her waist, always small, was now almost impossibly so, a delicate curve above hips that had widened with newfound muscle and the healthy appetite fueled by their magical rations.  Her legs, though not as long as Fiona's, were just as strong, her thighs firm and sculpted, her calves toned from days spent hiking and exploring.
Her skin, once pale and unblemished, was now a warm, golden brown, the color of sun-kissed sand.  A smattering of freckles dusted her nose and shoulders, each one a tiny star in a constellation of her own making.  Her hair, a shade of blonde that had deepened to a rich, honey gold, now hung in thick waves down her back, catching the light like spun gold.  Her face, though still possessing a delicate beauty, now held a hint of steel, a newfound determination that shone from her sapphire blue eyes.
They moved with a confidence born of experience and shared hardship, their bare feet, toughened by weeks spent traversing unfamiliar terrain, finding sure footing on the uneven ground. They were no longer the same women who had stumbled through the portal, their bodies bearing the echoes of a world that sought to constrain them. They were Fiona and Fanny, daughters of another world, forged anew in the fires of adventure, their bodies a testament to their resilience, their bond unbreakable, their spirits soaring.