I like Shapeways! You can use them to generate prints from 3D models that you design. However, at first I wanted to create 3D models with some extra hollow closet or whatever else to use for some small electronics. Problem is, these adages will also add more material and space, thus increase the price. So I decided to just create hollow busts from my model so I still have some hollow area but also a nice model without any other props.
To start, I use a few pieces of software. First of all, Poser Pro with more models. Although a little old already, I still prefer to use the Victoria 4 model from DAZ3D. With some extra shapes and textures, you can make some very beautiful models.
Next, I need a tool for handling and converting the 3D models. Here Accutrans 3D does a lot of magic for me, including minor fixes and allowing me to fix any textures. It also allows me to merge parts that use the same texture, which makes everything a lot simpler.
I use Netfabb for repairs, scaling and to cut the model in half, so I get a bust instead of a whole model. The free version is good enough for my purposes.
And I use Meshmixer to make the bust hollow and thus reduce the amount of material required.
So I start with creating a model and putting her in a proper pose for my bust. Poser can do that real fast and, what the heck, let’s keep her topless! I just want a simple example. And when the pose is done, I need to save it three times! First, I save the original pose as a Poser file. That way, I can make adjustments to the pose later on. Second, I do an export to the Collada file (.dae) format. Poser doesn’t do a good Collada-export, though, but it will copy all the used textures to my save folder, in a subfolder called textures! And I need those copies later on. The third file is a Wavefront file (.obj) which I will import in the next tool, after I copied the textures from the subfolder to the save folder.

So, this is what Abby will look like. Even though she is topless, I just kept the “naughty parts” hidden for my blog.
A few notes: Abby is a female Elf and I have used her for several CGI images already. I have never used her for a print, though. This will be interesting because her hair might not print as well as I hope, but this is all just a test.
Keep in mind that Shapeways has a Content Policy that is a bit strict when models are nude. Nudity is allowed as long as it is artistic by nature. However, the definition of “artistic” is up to the person reviewing the model and chances are that your model will be refused because they don’t think it is artistic enough.
Now I will have to merge the various parts for this model and maybe remove a few things that disturb my model. To begin with, my model will have a layer called “Cornea” and one called “EyeSurface”. Normally in Poser, those would be transparent and thus not visible, except for some extra shininess or added reflections. Unfortunately, they became visible in my model so I generally remove these layers. Also, there are “Eyelashes” that generally either lack a texture or are just completely black. I remove those too, in general.
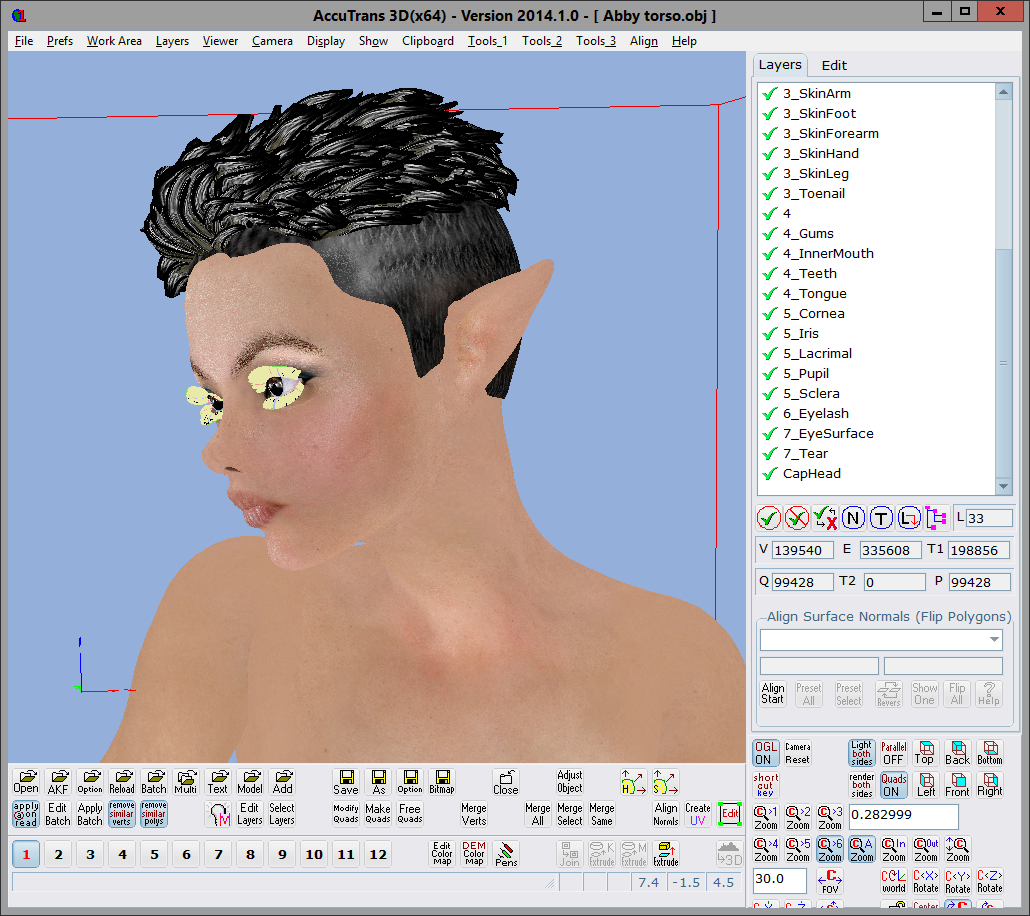
Once done, I use “Tools_1/Merge layers with same materials” to reduce the number of layers in my model. Then I save it to a new folder in two different formats. First of all, Collada, so I have a copy that I can use for this model. Next, a Wavefront file for further processing.
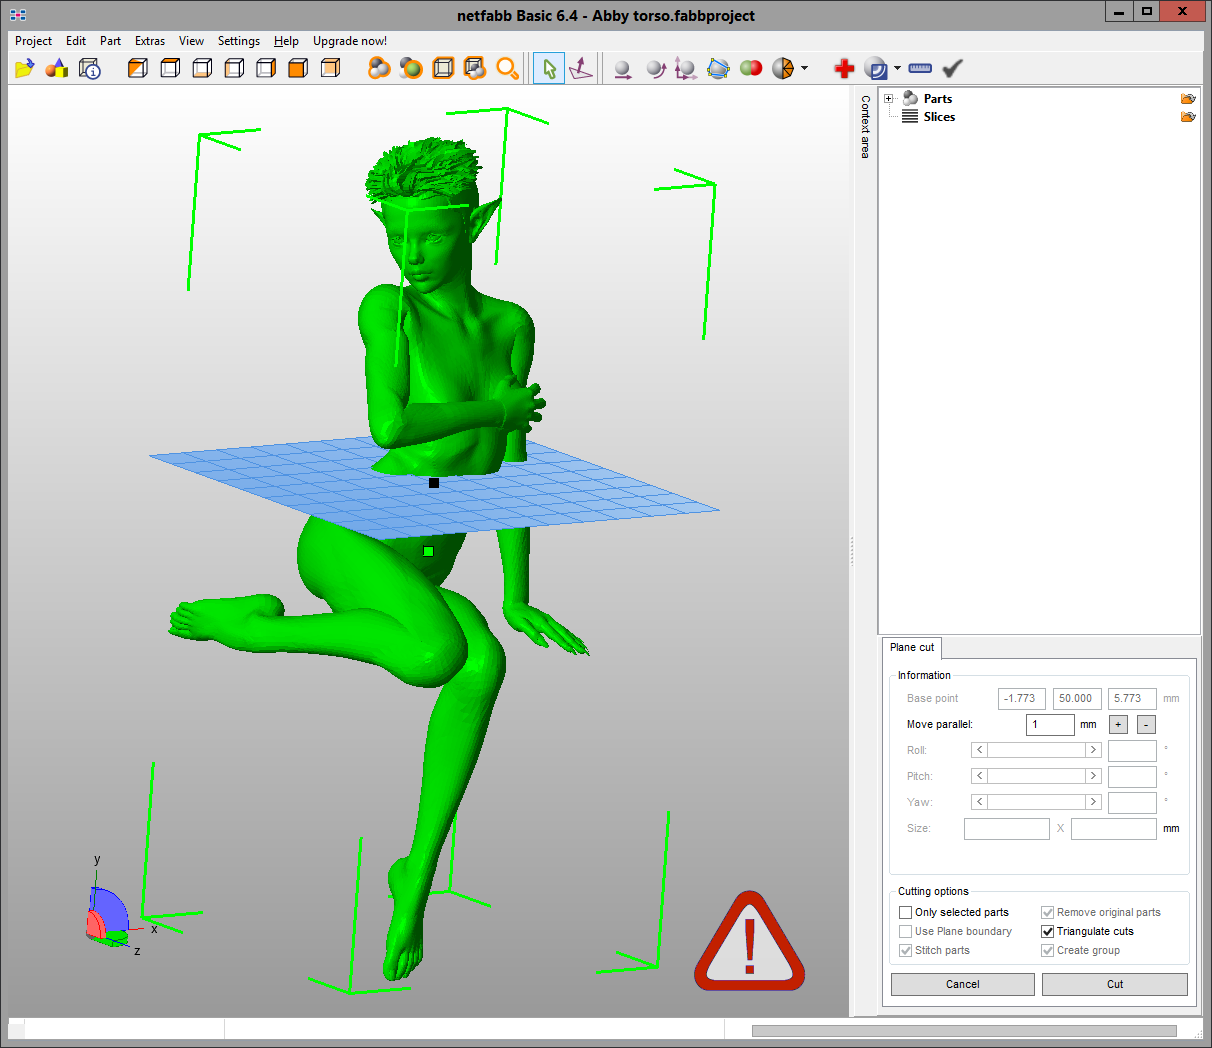
The next step is scaling and the first cut. Netfabb does a great job at this, keeping the textures intact!


As you can see, the complete model is naked, but that’s not a big problem. The bottom half will be cut away anyways. But first some scaling. The Y size is the largest value at 0.57 mm, which is very, very small. I’ll change it to 600, making the model about 60 CM high. I will then export the file to a new folder in Wavefront format again, and it will be saved including new texture files.
Now, I will make her hollow by using Meshmixer. Basically import the Wavefront file that Netfabb created and choose “Edit”Hollow” and the system will generate a hollow space inside your model.

Once you like the hollow area, accept it and export it to another new folder as Wavefront format. Because now we will have to make a cut! So we have to import the file in Netfabb again. And do a cut!
Although we’re only interested in the top half, I generally rename both parts (e.g. “Abby Top” and “Abby bottom”) so I can always decide to have both sides printed! With some glue, you can glue them together again.
But what does the result look like?

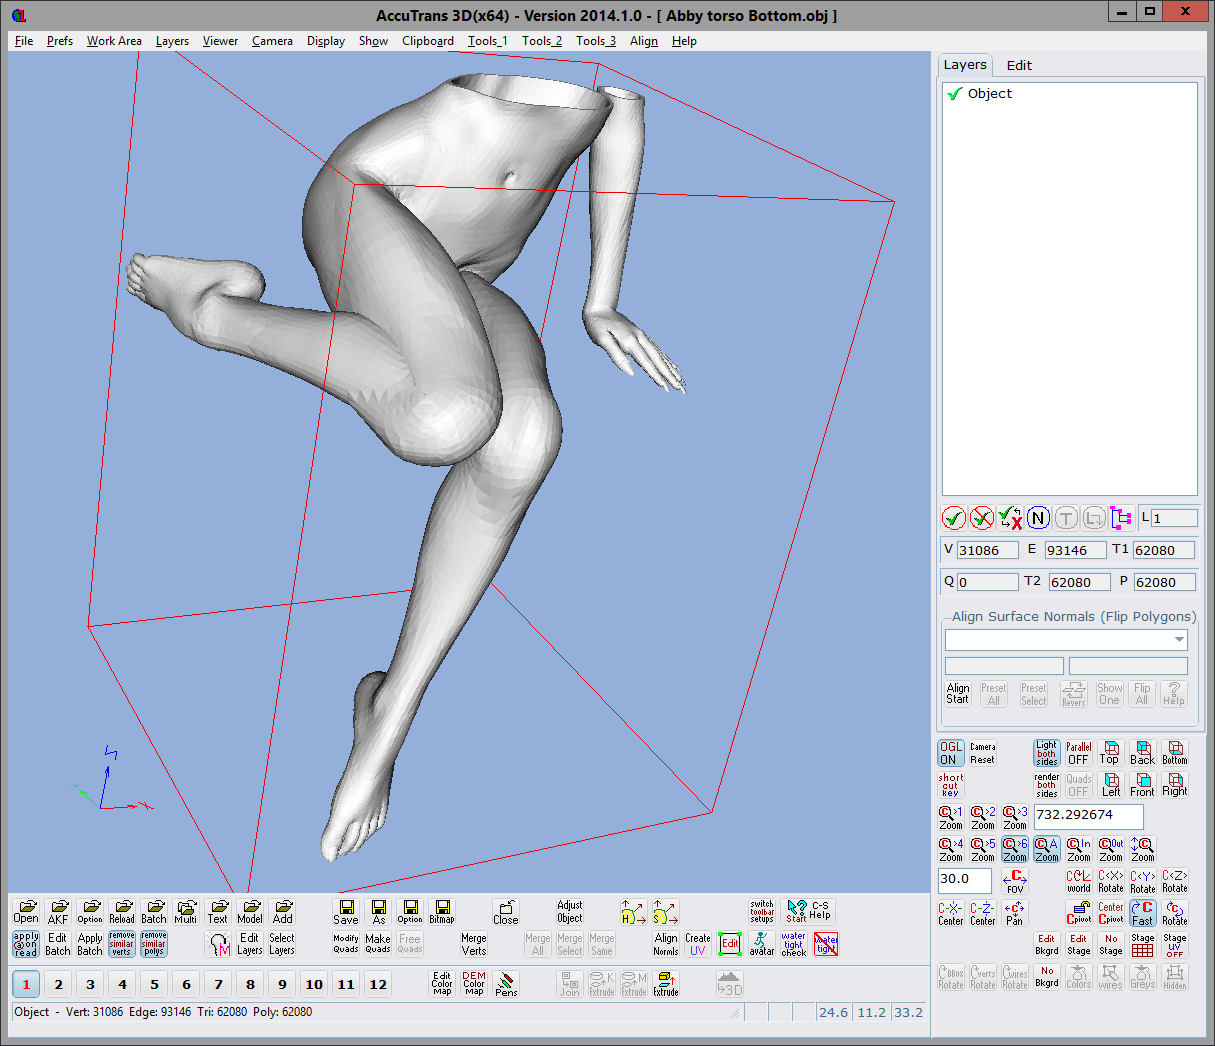
I’m a bit annoyed that the textures weren’t saved after I made the cut. Then again, I would like the print to be in white plastic anyways. The colored sandstone would not be strong enough to hold the thin walls and the colored plastic has a size limitation, which is a bit small to me. So this last white result is fine. I also show the bottom half but Shapeways will have some minor troubles with that part. The arm is not connected to the rest of the body so it would become two parts.
And the bottom part is nude, thus a possible content policy violation.
The last step is the upload to Shapeways. This is a bit slow but since I kept the model reasonable simple, I should have a result within a few minutes. In the meantime, do keep in mind that Shapeways will charge for the amount of machine space and not just material space when printing in white plastic. Thus, while the hollow model will require less material, you will still have to pay for the large size. And since the original size resulted in a print of $400, I reduced the size by 60% on Shapeways, which reduced mostly the amount of machine space. The price is now around the $100, which is still a lot. But hey! I have a hollow model now.
I could also upload the bottom part, reduce it by 60% and have both parts printed to get a complete model, which I have to glue together. But once I do that, I will likely use a nicer model instead. For now, I’m still doing a lot of experiments and I try to avoid printing a lot of them, since these prints are expensive.
Update
So, what does the final result look like?


As you can see, the model is about as large as my cup of tea. I can insert an RGB-led inside it to make a very colorful display. Not all parts are hollow, though. Her right arm is solid from slightly above the elbow. Also, I kept her mouth and teeth part of the model, so they became part of the solid areas too. So yeah, her teeth are printed too but you can’t see them. And the skullcap and hair was also made one solid piece though her head, as part of the auto-repair or whatever. This makes her top a bit heavy but it is still stable enough to stand.
I also learned that scaling and cutting a model can be done from Meshmixer quite well and that too gives great results. With Meshmixer you can also add holes to a hollow model so you don’t have to cut it in two parts. The small hollow spaces would allow the unused material inside the model to fall out. But then you will have a model with small holes in it.
As I have been experimenting with these pieces of software, I’ve learned that Netfabb has a great repair function similar to what Shapeways uses. All three apps together make some pretty powerful tools for anyone who wants to create 3D models to print.
