As you might know, I’ve played for years with Poser Pro now. And for about a year, I have created printed models through the services of Shapeways while also creating all kind of artwork with those Poser models and E-ON Vue. But more recently (well, less than a week ago) I started experimenting with OpenSCAD, which is an open-source CAD application where you just “program” a special script file and it will generate a 3D model for you based on that script.
So, to start I will show you how I created a special box for my electronic experiments, which is my Shapeways model. It is a rectangular box with five holes in the side for wires that lead to a small, round container. Not sure what I want to build inside it, but I just like the shape and it is a nice experiment to start with.
This is a box with two different lids. One round, one rectangular. The rectangular lid will also contain a small engraved text.
To start, I create a simple module to create the lid:
module BoxLid(width, height, depth, groove){
    union(){
        cube([width, height, depth/3]);
        translate([groove, 0, depth*1/3])cube([width-2*groove, height-2*groove, depth*1/3]);
        translate([groove/2, 0, depth*2/3]) cube([width-groove, height-groove, depth*1/3]);
        translate([width*6/20, groove*1, -depth*1/3]) cube([width*8/20, groove/2, depth*1/3]);
        translate([width*7/20, groove*2, -depth*1/3]) cube([width*6/20, groove/2, depth*1/3]);
        translate([width*8/20, groove*3, -depth*1/3]) cube([width*4/20, groove/2, depth*1/3]);
    }
}
This set of cubes will create the lid that will slide in a special slot that we will add to the box. The first three cubes are of various sizes and create a groove to slide over. The lid will completely cover the side of the box.
The last cubes are used to put some relief on the lid to allow it to slide easier up and down. But I want to have it engraved with some text, so I create an engraving module:
module label(name, depth, fontSize){
    linear_extrude(height = depth) {
         text(name, size = fontSize, font = "Lucida Calligraphy", halign = "center", valign = "center", $fn = 50);
     };
}
And I need a second module for the lid including the engraved name:
module NamedBoxLid(width, height, depth, groove){
    difference(){
         BoxLid(width, height, groove, groove);
         translate([width/2, height/2, groove/2]) rotate([0, 180, 270]) label("Team Katje", groove, 8);
     }
}
Yeah, engraving is just that simple! Subtract the shape of the text from the shape of the lid. The most tricky part is actually trying to rotate it and making it fit. But it also tells us how we can create a box. We basically make a box and subtract the lid from it! I will also subtract 6 cylinders from a side for the holes to the round box on the side. And we will also subtract the inner space from the box so it has space:
module Box(width, height, depth, groove){
    difference(){
         cube([width, height, depth]);
         union(){
             translate([groove, groove, groove]) cube([width-2*groove, height-2*groove, depth-2*groove]);
             translate([width*1/5, groove*3/2, depth/2]) rotate([90, 0, 0]) cylinder(h=groove*2, r=groove*2, $fn=precision);
             translate([width*4/5, groove*3/2, depth/2]) rotate([90, 0, 0]) cylinder(h=groove*2, r=groove*2, $fn=precision);
             translate([width/2, groove*3/2, depth*1/5]) rotate([90, 0, 0]) cylinder(h=groove*2, r=groove*2, $fn=precision);
             translate([width/2, groove*3/2, depth*4/5]) rotate([90, 0, 0]) cylinder(h=groove*2, r=groove*2, $fn=precision);
             translate([width/2, groove*3/2, depth/2]) rotate([90, 0, 0]) cylinder(h=groove*2, r=groove*2, $fn=precision);
             BoxLid(width, height, groove, groove);
         }
     }
}
Or actually, I combine the five holes, the box content and the lid together into a single shape and subtract the whole shape from the box. This way, I know the lid will fit perfectly on the box.
All I have to do now is create the second, cylindrical box on top of the holes. For this, I again start with creating a lid:
module CylinderLid(width, groove){
    union(){
         cylinder(h=groove, r=(width-groove*2)/2, $fn=precision);
        translate([0, 0, groove])
         difference(){
             cylinder(h=groove, r=(width-groove*2)/2-groove, $fn=precision);
             cylinder(h=groove, r=(width-groove*2)/2-groove*2, $fn=precision);
         }
     }
}
Again, a simple procedure of stacking two cylinders on top of each other. However, to make slightly more room, the smaller cylinder is hollowed by subtracting an even smaller cylinder. The result is a ridge to keep the lid in place.
And like the box, I will subtract the cylinder lid from a hollowed cylinder:
module CylinderBox(width, height, groove){
    difference(){
         cylinder(h=height, r=(width-groove*2)/2, $fn=precision);
         union(){
                 CylinderLid(width, groove);
                 translate([0, 0, groove]) cylinder(h=height-groove, r=(width-groove*2)/2-groove, $fn=precision);
         }
     }
}
Now I know that the cylinder plus lid will be exactly the proper height together. All I have to do now is put them all together:
width=40;
height=80;
depth=width;
groove=2;
cylinderhight=12;

Box(width, height, depth, groove);
translate([0, 0, depth+3]) NamedBoxLid(width, height, depth, groove);
translate([width/2, groove, depth/2]) rotate([90, 0, 0]) CylinderBox(width, cylinderhight, groove);
translate([width/2, height/2, depth+10]) rotate([180, 0, 0]) CylinderLid(width, groove);
translate([width/2, height/2, depth]) cylinder(h=10, r=1, $fn=precision);
I first specify the sizes for the box in millimeters. It will be 4x4x9.2 CM in size, which is large enough for a 9 volt battery plus holder, some wires and maybe some other stuff.
Next, I create the box at the standard location. Above the box, I put the lid, with some space in-between to keep them separate. The cylinder is put against the box itself around the holes but the lid for the cylinder is put on top of the lid for the box itself.
The last thing connects the box and the two lids to make it all a single part. On Shapeways, you have to pay extra if it is all separate parts so make sure you connect it all together with thin connectors that you can easily cut away with a sharp knife. And yes, I checked to make sure it doesn’t go through the line of text on the lid!
Now, what does it all look like? Well, just look at these images:


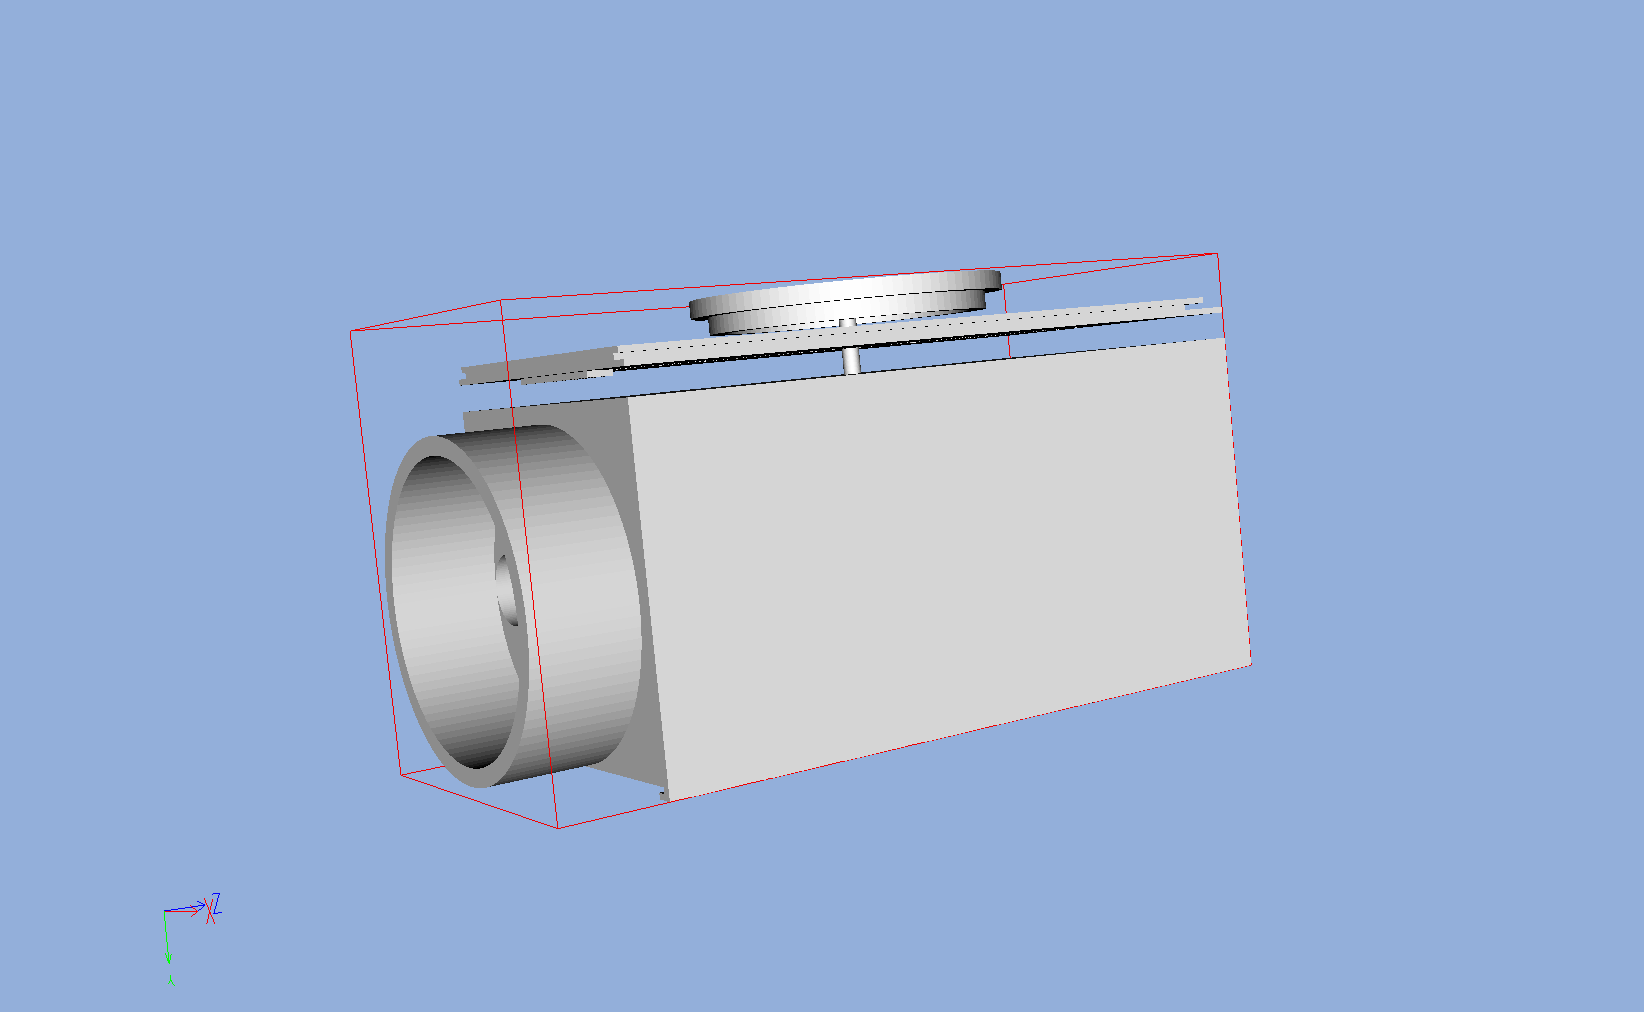
It is all quite easy to do, although it requires plenty of math to get things in the proper locations. I haven’t explained the math part and I won’t. I’m just showing what you can do with OpenSCAD and a few hours of free time.
The result is a .STL file that you can upload to Shapeways to have it printed. As an alternative option, you can also convert it to an .OBJ file format and import the box into Poser, and add a Poser model on top of the cylinder lid, just for fun.
Or you will add textures to the shape and use it in Poser/Vue to create some new image. It can be even more interesting if you can combine a 3D printed model together with a rendered image of the same model.
I still have a lot to learn about OpenSCAD but this tool allows you to specify exactly the shapes that you want for your 3D model and allows you to create modules that will allow you to do some complex things like separating a lid from a box.
