Print your own cases, part 5 of 10

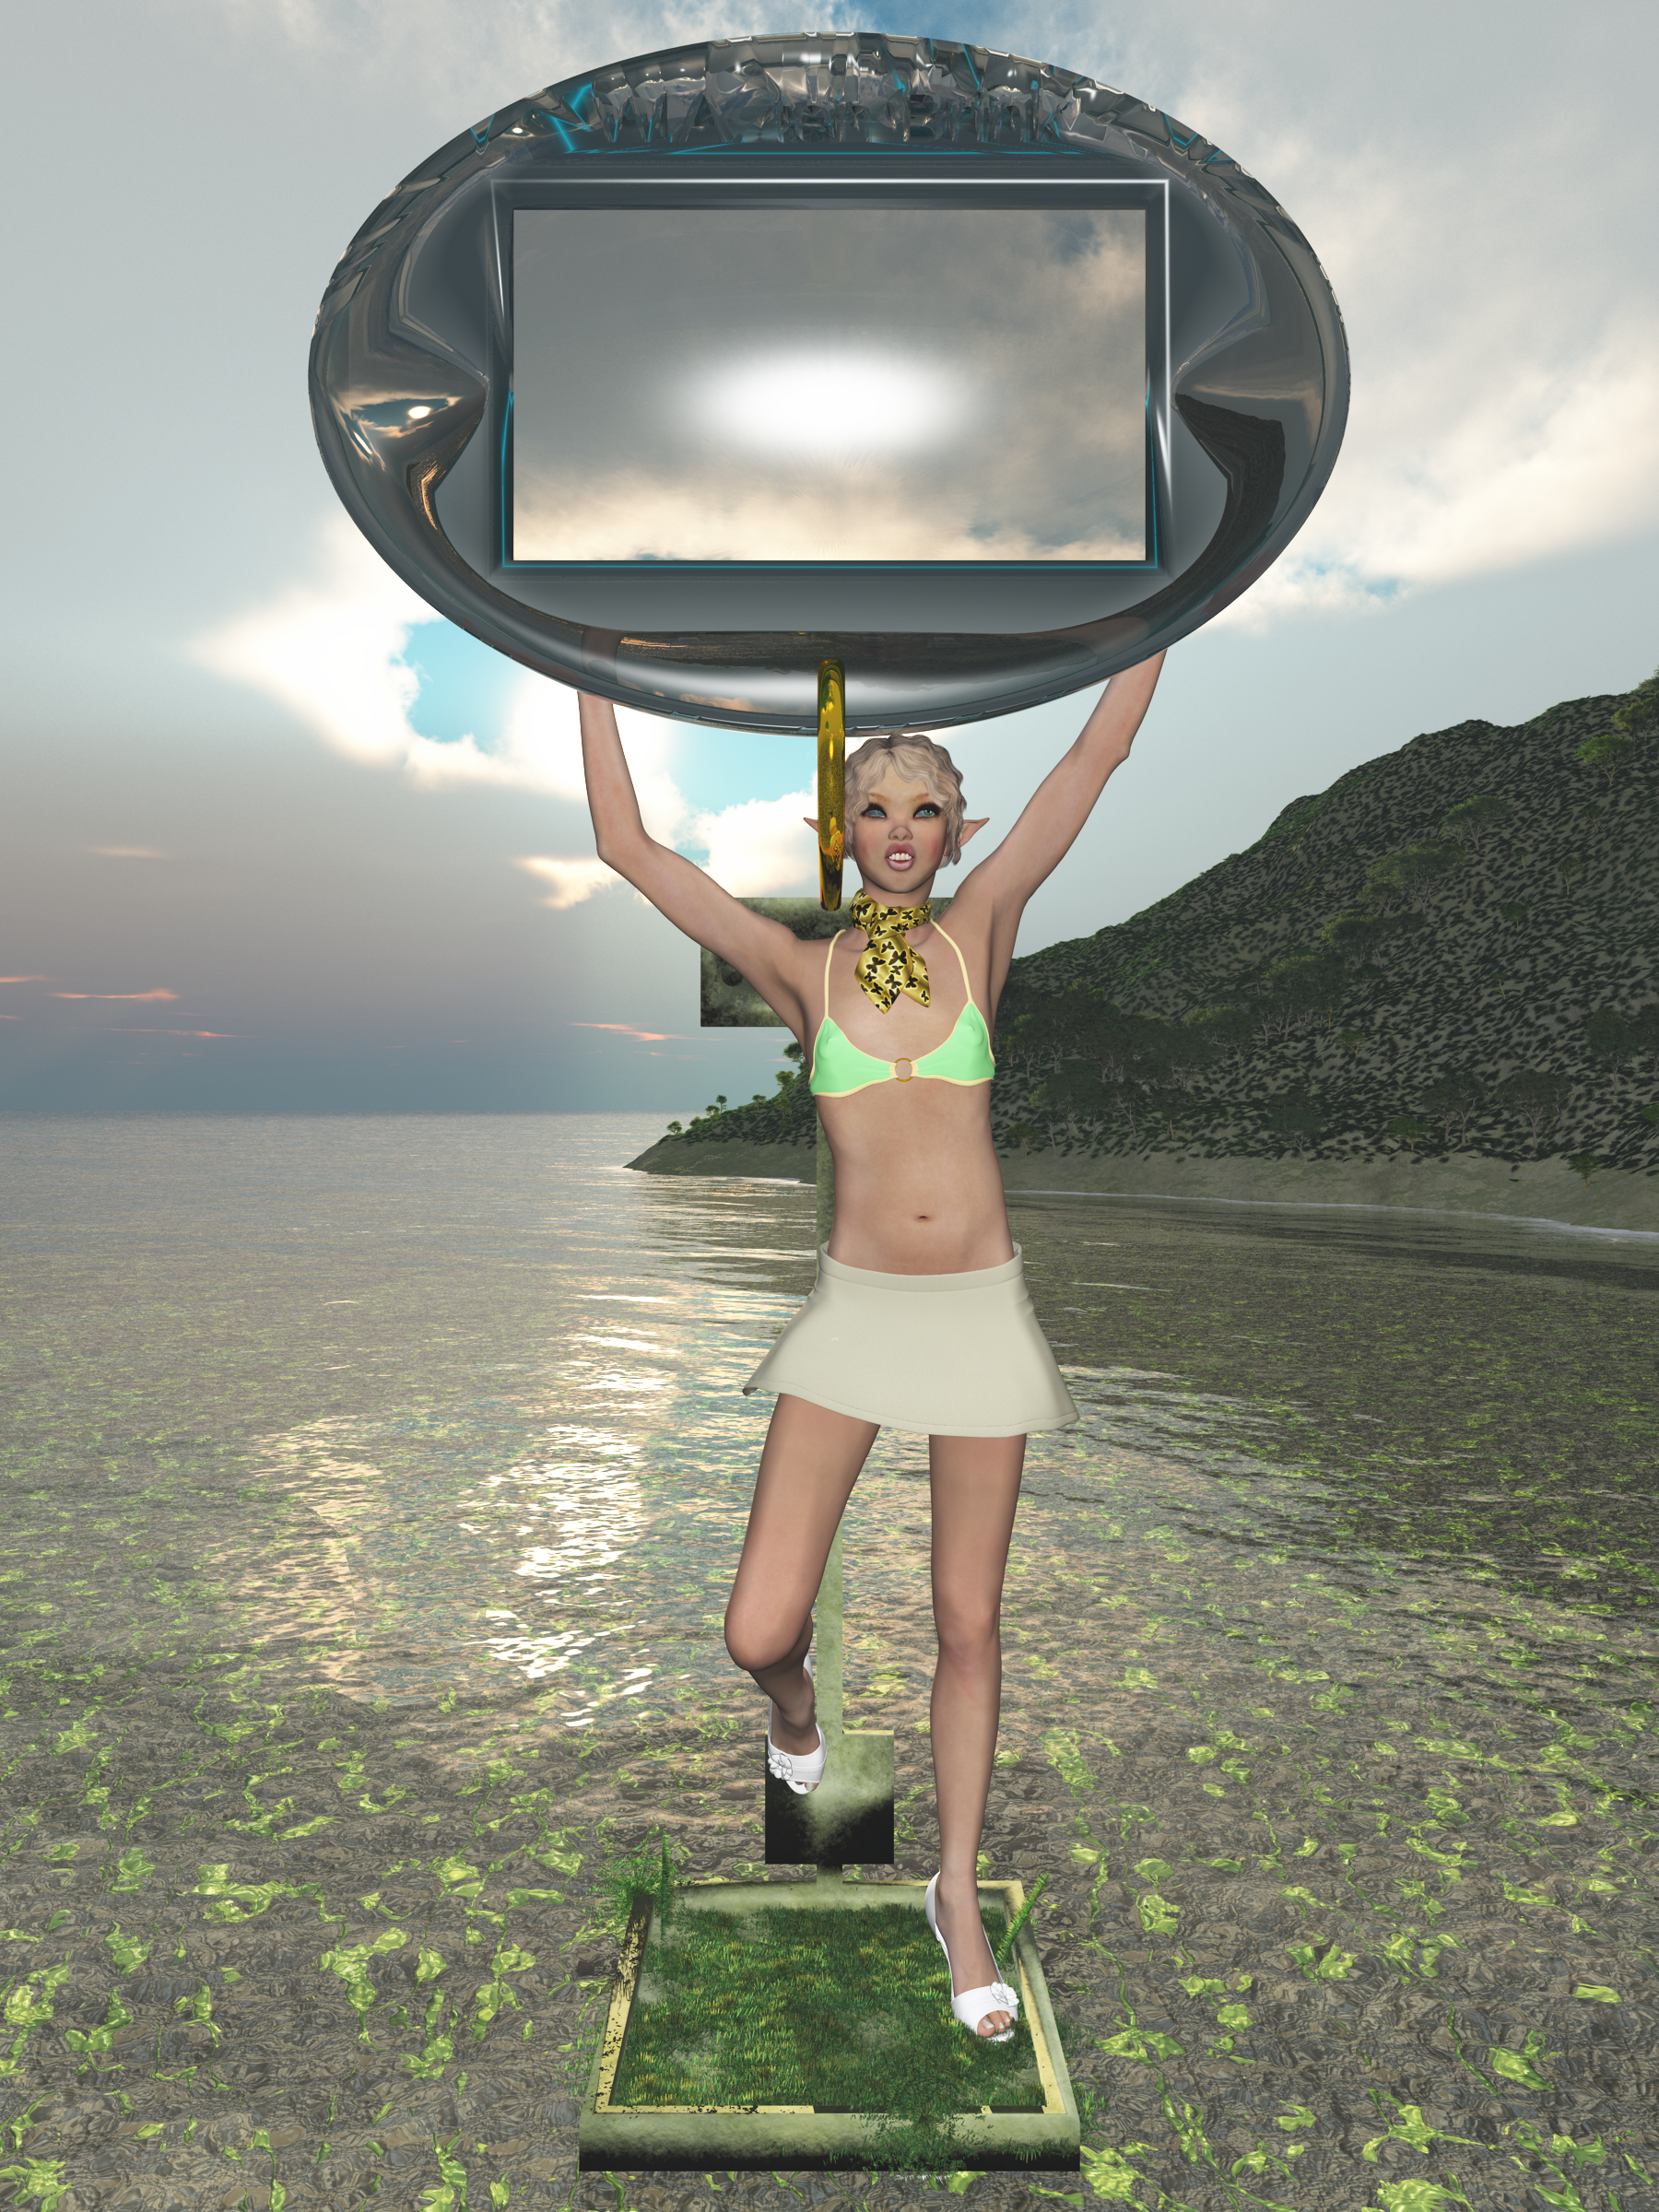
In the previous post I created a Poser model and a few OpenSCAD models and joined them into one. But before I continue to manipulate them to make them ready for 3D printing, I wanted to do an artistic rendering of the model, just to show off! This means that I want a complete background with water, trees and other stuff and the model in the middle of it all, well-lit and looking cool.

While it might seem a waste of time, it does give one extra view on your model before you continue processing. It will look okay but the OpenSCAD objects will not have any color. Problem is that painting those object cannot be done in Poser or OpenSCAD so if you want a specific coloring of those objects, you will need a special tool to do so.

2016-04-19 (4)

Modeling in Vue is quite easy. You just import the Poser model and then you put it where you want it to be. But once imported, you should turn down the highlights of the Poser model, else it starts to shine, which isn’t pretty. So, select the complete Poser model in Vue and click “Edit all materials” to change the highlights. 

Vue now has a value of 50% for my model. This is actually the highlight of one part of your model and not all parts! But if you change this value, it will change it for all.

2016-04-19 (6)

Since it has the value of 50%, I can simply overwrite it with 0. If it had been 0, I would have chosen the value of 1 instead.

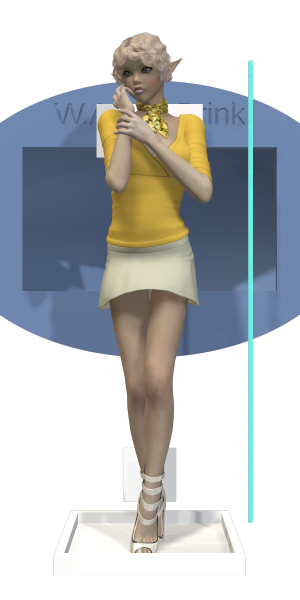
I have already removed the ruler from the list of parts in Vue and I can easily find the other pieces that I’ve created because of their names. Unfortunately, Poser tends to name all figures “body” while all properties keep their old name. And that’s a bit annoying.

Often I will rename those parts but this will just be a quick render so, skip it.

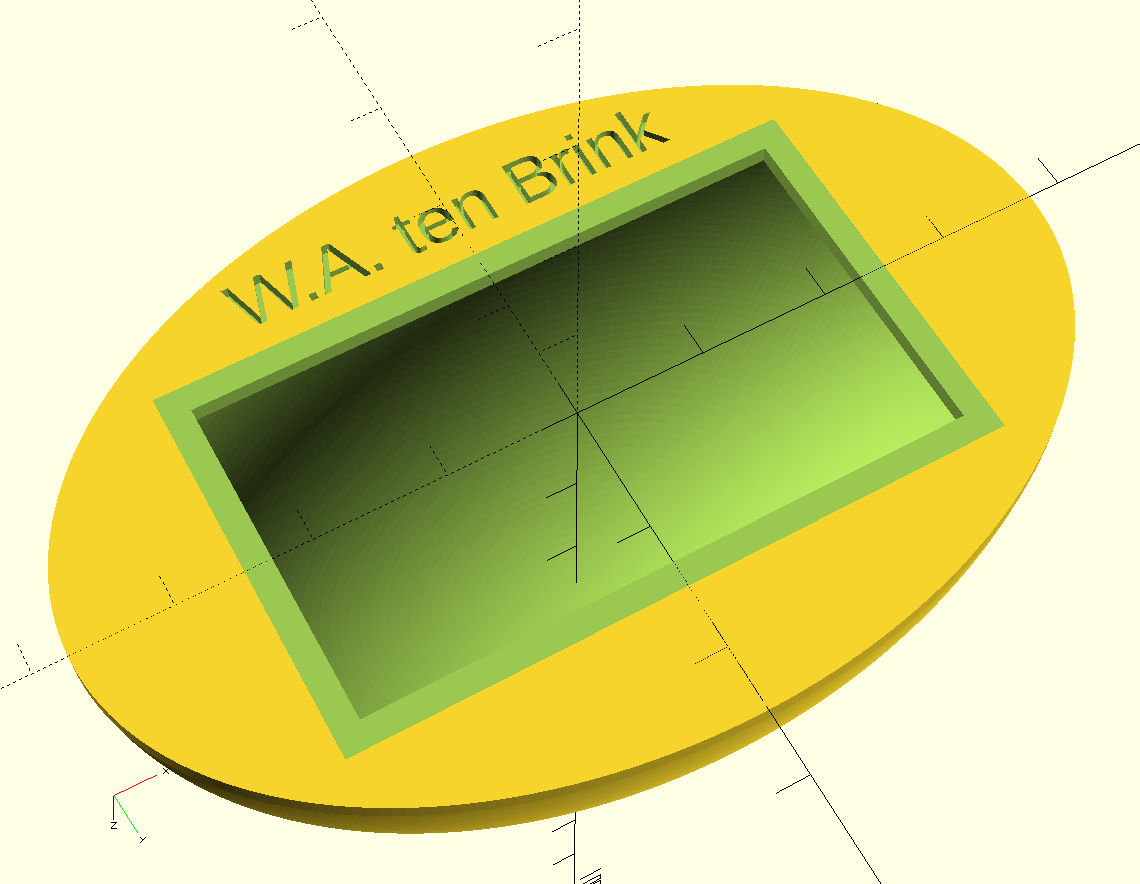
Since I lack the tools to paint the OpenSCAD models, I will just pick a few from the materials that Vue already has. I decide to pick grass for the back panel because it always looks good to have a model walking on grass. And I pick dark smoked glass for the box. The cane will be gold, making it shine.

Next, I check the materials that are provided by Poser. The dress, for example, has a zipper which uses a reflection map. I hate those, because Vue does a full 360-degree view of everything if I want to. Reflection maps are a poor alternative for real reflections.

2016-04-19 (7)

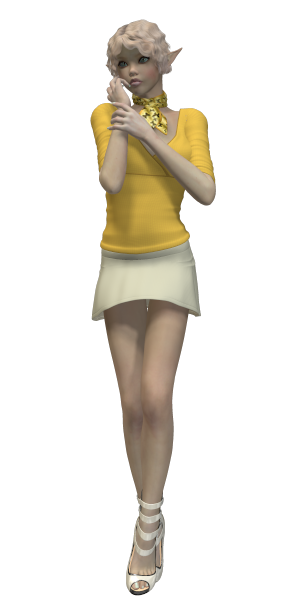
I also decided to change the color of her bra. This won’t replace the texture but just the color. And I decide to pick an orange trim and green cloth, both pastel-tints.

2016-04-19 (8)

I also decide to put the sun in the background to create a kind of ‘eye in the sky’ so I also need a second light, which I put at the location of the camera. To get it there, I just select the camera, which will put it in the center of the views. When you add lights or objects, they will be put at the same place. Thus, the light is at the location of the camera!

And a quick preview of the image shows me that it will look good. So let the rendering start!

Now, one reason I use Vue to create an artistic image is because it allows me to use a transparent material for some of the more complex objects. In this case, that would be the box with its round shape. With the image rendered at a large resolution I can check the box for possible flaws, if I want to use it again with another model.

In my next post I will show how I clean the model using Accutrans 3D. In the mean time, this is what the rendered artwork looks like:

Anarani for blogpost

Print your own cases, part 4 of 10

In my previous post I created a round container for my electronic thermometer and now I need to add it to my Poser model. But I also need a special stand for Anarani to stand upon, with a back panel for a couple of magnets. Lets immediately start with the OpenSCAD script:

$fn=250;
difference(){
  union(){
    cube([60, 60, 6]); 
    translate([28, 0, 0]) cube([4, 3, 160]);
    translate([20, 1, 10]) cube([20, 2, 20]);
    translate([10, 1, 140]) cube([40, 2, 20]);
    translate([30, 1, 20]) rotate([90, 0, 0]) cylinder(d=12, h=1);
    translate([20, 1, 151]) rotate([90, 0, 0]) cylinder(d=12, h=1);
    translate([40, 1, 151]) rotate([90, 0, 0]) cylinder(d=12, h=1);
  }
  union(){
    translate([3, 3, 2]) cube([54, 54, 5]);
    translate([30, 1, 20]) rotate([90, 0, 0]) cylinder(d=10, h=2);
    translate([20, 1, 151]) rotate([90, 0, 0]) cylinder(d=10, h=2);
    translate([40, 1, 151]) rotate([90, 0, 0]) cylinder(d=10, h=2);
    translate([30, 2, 150])
    rotate([270, 180, 0]) height = 2) {
      text("Anarani", 
      size = 7, 
      font = "Harlow Solid Italic", 
      halign = "center", 
      valign = "center"
      );
    }
  }
}

This isn’t very special. A floor plate with an edge and a pole with two plates which will hold the magnets. As you may notice, there is no connection to the box that I created in the earlier post. That connector will be something from Poser. All you have to do now is to convert these models to WaveFront .obj files and you can import them in Poser. So, let’s combine them with Anarani! And this will show a few issues with importing in Poser.

2016-04-19
Anarani for blogpost II_0001

When you do import models in Poser, prefer to enable “Percent of standard figure size”. The reason for this is that the standard figure size is extremely small, compared to the imported objects. I will scale them anyways once they are imported and because their size is relative to Anarani, I can use integer values between 1 and 100 to scale them. Otherwise, I would need to scale them to very small numbers with fractions.

Now, to do a proper scaling, I will use the ruler to measure the height of the opening in the temperature holder, which should be 46 mm. I will then use the ruler to scale the back panel to the proper size, thus having it synchronized with the size of the box.

You could wonder why I don’t combine all three parts into one .obj file and import that one, but when I do that, it becomes just a single part. And I need to move them around, so that isn’t very practical.

So I end up with my model looking like the image on the right. The temperature box is too big and the ruler is extremely small. The back panel seems to be okay, though. But first I will have to put Anarani in a nice pose. And reconsider the clothing she’s wearing, since not all clothes will print well on Shapeways. (Hint: if a piece of clothing is transparent when you look at it from a specific angle in Poser then it will not print very well!)

The next step is trying to make everything fit. Since the box is quite large, I decide that Anarani will hold it above her head, thus making the model even taller. I don’t want it to go in all three directions because that would require more machine space, thus making it more costly. The final height will be about 22 cm and it’s 75 mm wide and about 60 mm deep. (The sizes are from the bottom panel and the box.) The ruler is set up vertically so I can use that to scale it to the proper length, which would be 60 cm. I will then cut away the ruler from the model and thus have the exact height, although I don’t think the width and depth will change much from my prediction.

Anarani for blogpost III_0001

Anarani will look like this image. One foot on the floor panel and a second one against the back panel. Both feet touch these panels so they should be connected, although the support will be tricky.

The ruler has moved towards the back and will be used in one of the next steps to set the proper scale of the model, before I will remove it.

The box itself is held up by her arms. Here, the hands will need to touch the box to make sure that connection is strong too. But they can’t connect too well, else the fingers will disappear.

To get things at the proper size, I started with matching the ruler to the length of the back panel, which was 16 cm. I then used this to scale the box so the vertical height of the opening is 46 mm. If I did the math well, my device should fit just nicely.

Anarani for blogpost IV_0001

I have given Anarani high heels to wear and replaced her top with a bikini. This bikini top has a clothing thickness property allowing me to set the thickness of it, thus making sure it prints better.

The skirt she’s wearing is also special, since it is one of the few skirt models I have that has both an inside and an outside. Most clothing props for Poser tend to just cover one side and the render engine is smart enough to come up with the other side, if it needs to be rendered. But when you want to print those props, then the thickness is unknown and the repair function of Shapeways will actually fill it all up, thus turning the inside of a skirt into a massive block. With this skirt, I still have a skirt that you can look under.

I won’t tell if she’s wearing a bikini bottom!

As an extra support for the box I used a cane prop from Poser and put it to the proper scale and thickness. It should add stability to the whole thing. making sure the bottom plate doesn’t bend over due to the weight of it all. Since there will be magnets on the back side, that bottom plate would not be supported and thus bend. This cane also required me to make Anarani bend slightly. After I put the hands in placed and locked their place, I moved her hip to the side and started to bend back her abdomen and chest to go near the cane again. Next, her neck was bent away from the cane and her head back to the cane so her neck and head (and hair, ear) would not touch the cane.

To make sure it is well-balanced, the whole box is in the center of the floor panel so it doesn’t matter that Anarani is leaning on her left foot. Gravity works downwards so the model won’t tilt to the left or right. Also, the border on top of the floor plane was added to make it stronger without making it much thicker.

I used a cane because the box is higher than the back panel. The cane adds a few more cm to this height. Add to this the height of the box (50 mm) and you get close to my estimation of 22 cm in total.

In my next post I will render the model in Vue, with some interesting textures, just to show what it will look like.

Print your own cases, part 3 of 10

In the earlier post I created a ruler so I can make sure that my box will have the exact size that I have specified. As I said, Poser loses this information, forcing me to fix the scale of the export file once I’m done with the model in Poser.

Temperature-Sensor
Mini Digital LCD Indoor Convenient Temperature Sensor Humidity Meter Thermometer Hygrometer Gauge

The device I will use is this thermometer that’s also shown on the left. (Image from AliExpress.) And the first thing I will have to do is measure it to get the exact dimensions. This is tricky because if you get the dimensions wrong, it either won’t fit or will be too loose to fit.

AliExpress does mention the size (3 cm x 4.8 cm x 1.6 cm) but these turn out to be incorrect! So, never assume the site will have exact measurements! Worse, this device has a small border that’s slightly bigger than the case itself, allowing a nice fit, but I need the size of the box, not the border. So, I take my ruler and start measuring the box. I end up with 45.75 mm x 25.9 mm x 13.5 mm. So, that’s the shape I need in OpenSCAD, which I will subtract from the real container.

The container itself needs to be hollow and must have enough space to contain the device. And for this one, I want a container that is round. That adds more complexity but it will look better. And I want my name on it, so people know it’s mine!

Making this shape isn’t difficult but you need to play around a bit. I did create the clock as a block to subtract from my shape and I did this to make sure that it fits. Especially the back should not have any holes from the corners of the device, otherwise, it won’t fit.

However, to create these oval shapes in OpenSCAD you need to create a round cylinder and a round sphere and then resize the width, height and depth to the required dimensions before subtracting the box. This slows down the rendering slightly, especially if you use high details.

And in the top of my script I use ‘$fn=250;’ which sets the detail level to a reasonable level. Simply put, OpenSCAD can’t create round shapes but can make a close estimate by using triangles and squares in a curve. With a value of 6, my shape would actually be a six-sided model. With 250, the round shape is actually made of 250 small, flat panels. Since I’ve set it to be 75 mm wide, those panels will be barely noticeable. Do keep in mind that the 3D printer won’t be able to make round shapes either so the value of 250 will be small enough to match the print resolution of Shapeways. But if you polish it, the shape will become more round.

Now, the script:

$fn=250;
module Box(){
  translate([-23, -13, 0]) union(){
    difference(){
      union(){
        translate([0, 0, 0]) cube([46, 26, 14]);
        translate([-2, -2, -2]) cube([50, 30, 2]);
      }
      union(){
        translate([23, 13, -0.1]) rotate([180, 0, 0]) linear_extrude(height = 2) {
          text("12:30", 
          size = 10, 
          font = "Lucida Console Regular", 
          halign = "center", 
          valign = "center"
        );
        } // text
      } // union
    } // difference
    difference(){
      translate([-2, -2, -3]) cube([50, 30, 2]);
      translate([0, 0, -3]) cube([46, 26, 14]);
    } // difference
  } // union
}

difference(){
  resize(newsize=[75, 50, 27.5]) union(){
    cylinder(d=75, h=2);
    difference(){
      sphere(d=75);
      union(){
        sphere(d=72);
        translate([0, 0, 2-75/2]) cube(75, center=true);
      } // union
    } // difference
  } // union
  union(){
    Box();
    translate([0, -19, 1]) rotate([180, 0, 0]) linear_extrude(height = 1) {
      text("W.A. ten Brink", 
      size = 4, 
      font = "Lucida Console Regular", 
      halign = "center", 
      valign = "center"
    );
    } // text
  } // union
}

This time I did not create a separate method for the texts simply because I use only two texts of different sizes. Creating a module for that would require an additional parameter and the text function isn’t that complex.

I first create the box including a border and make it look a bit pretty. I make sure that the box-part that needs to be subtracted aligns to the center of the X-Y plane and lies against the zero Z plane. The border will stick out anyways but it allows me an easier way to put it in the proper place. Because of this, I don’t need to translate the position of the box.

Please, do notice that the text on the box is offset at 1/10th of a millimeter because else a thin piece of those numbers will become part of the rendering! Those would become loose parts so I need to add an offset. This is something you have to do when you do into the negative parts. I should actually do the same for the border but actually like the small line that it adds. It won’t be really noticeable when printed, though. But in the 3D software it will be visible as a thin line.

The dimensions of this box are 75x50x27.5 mm which is a bit large. Then again, the device itself isn’t that small either.

Like the ruler, I uploaded this model to Shapeways to get an estimate of the price and looks. It has slightly more volume as my ruler but the price is more than double of my ruler! The reason for this is because the price for plastic is determined by the volume of the model and the machine space that it takes. And although my ruler was long, it was also thin and not so high, thus it did not need as much space as this model.

In my next post I will combine this model with my model Anarani. In that post, I will also create the platform for Anarani to stand upon, although that won’t be very special.

Print your own cases, part 2 of 10

In my previous post I mentioned that I need a ruler to use with my Poser models. The reason for this is very simple. When you export a model from Poser, the proper size of the model isn’t written correctly in the export file. Poser is a great application but it has troubles doing a proper export. As a result, you might think your model is 20 cm high but it happens to be just one millimeter. Why? Because Poser doesn’t write proper measurements.

Now, things are simple when you know what size your model is supposed to be. If you want your model to be 20 cm high then you just rescale it in MeshMixer and you’re done. However, if you have a box or case as part of your project, chances are that the model will be bigger in all directions than this box. The box might be 5 cm high but the model is 20 cm high. How to fix that problem?

Well, the solution is simple. Create a model of a ruler with tags for centimeters and millimeters. Make it very long so it will be longer than your model. And when you’re modeling in Poser, use the ruler next to the object that you need to have at a precise size. Scale the ruler so the size of the object matches the desired length. Do not scale the object to fit the ruler, though! You won’t need to.

When you have set the ruler to the proper scale, you can continue to work on your model. Make the ruler about twice the length of your model, which is 60 cm for me. When you do an export, keep the ruler part of the model but move it to the side or back so it can be cut away with MeshMixer or NetFabb. This will allow you to set the proper scale in MeshMixer to 60 cm as the height (or width, depth) of your model.

I want a simple ruler with small tags for millimeters and longer tags for centimeters. I also want the numbers for centimeters to be on the ruler so I don’t have to count. And I will number all the centimeter ticks too, just because I can.

$fn = 50;
length=300;
width=6;
thickness=1.6;
center=0.8;

module SetTag(number){
  linear_extrude(height = thickness) {
    text(number, 
    size = width/2, 
    font = "Lucida Console Regular", 
    halign = "center", 
    valign = "center"
    );
  };
} // SetTag

cube([length*2, center, width], center=true);
difference(){
  cube([length*2, thickness, width], center=true);
  union(){
    for(i=[-length:2:length]){
      translate([i, 0, (width-1)/2]) cube([1, thickness, 1], center=true); 
    } // for
    for(i=[-length:10:length]){
      translate([i, 0, (width-2)/2]) cube([1, thickness, 2], center=true); 
    } // for
    for(i=[-length+10:10:length-10]){
      translate([i, 0, -(width/8)])
      union(){
        rotate([90, 0, 0]) SetTag(str(i/10));
        rotate([90, 0, 180]) SetTag(str(i/10));
      } // union
    } // for
  } // union
} // difference

I created a special module to place the text on the ruler. I generally copy and paste it from my other projects since it defines my default settings for handling texts. You don’t need to do this but it makes the call to the text function easier.

I create two cubes for the ruler. One happens to be a thin part which makes the whole ruler solid. The other fattens the ruler so I can carve the ticks in the ruler without making parts too thin. This would allow me to even print my ruler, if I want to.

I’ve set up several variables so I can make as many rulers as I like, although the rendering can be a bit slow for long rulers. There are ticks carved for every 2 mm but you have to be aware that the middle of each tick is the exact place, not the left or right side of it. The zero tick is exactly in the middle, going half a mm in both directions. Keep this in mind since the ticks at 30 and -30 will be half the size of the other ticks. When you use the ruler to measure things in Poser, measure from the zero tick, not the ends of the ruler!

The numbers are at the proper spot, with all negative numbers on one side and positive numbers on the other.

Ruler

This ruler is very long but that’s the purpose of this ruler. I have uploaded it to Shapeways – Ruler and it is available there for about $7, excluding postage and taxes.

In my next post I will create the case for the thermometer.

Print your own cases, part 1 of 10

It’s about time I started blogging again and this time I just write a series of 10 parts explaining how I create small, plastic cases for all kinds of stuff. For example, like the battery container in a earlier post.

I like to use my 3D printed models as cases for my own electronic experiments. I’m still experimenting but things can be quite interesting this way. The things you create this way are unique. No one else has something like it, unless they can use your model to print their own cases. And this time I’m going to create a case for an electronic thermometer/hygrometer that I bought from AliExpress for € 1.28. And I want a pretty girl model to hold it up so I need to create a second structure to add stability to the whole model, since it would be top-heavy with the device high up. I will solve this by including space for a few 10mm round magnets that I have so I can put the whole thing against my whiteboard.

So, I will have a flat bottom with a small back panel that holds space for the magnets and a beam that will go up to give more support to the box. This beam will also hold a magnet on the top to better stick it against my whiteboard, else gravity will turn it upside-down. (Been there, done that!) An extra cylinder will connect the box to this beam so the model will be quite stable. That cylinder will need to be added in Poser since I don’t know where the box will be when I create it.

Anarani for blogpost
Anarani

But because I need exact measurements I’m also going to create a model for a ruler, so I can scale the ruler in Poser to synchronize it with the dimensions of the case. Why? Because Poser doesn’t create export files with proper measurements so you need to rescale them afterwards! Since I know the length of the ruler and since it will be the longest part, I should be able to fix the scale again to the proper length.

The model will be Anarani, who happens to just look pretty and I have printed her as a model before. She’s a small elvish character and she’s one of my favorite cyborg models. However, for this post I will use her without the cyborg parts. Anarani will be standing and holding the case at around her chest or higher. This means that the model will be tall and thin and I will later explain why that’s a good thing. (In short, it’s less expensive…)

So, with the model in my mind, I will also make an artistic rendering of the model just for the fun of it. It’s not complex but you will need to add textures to the case.

So, what software do I use?

  • OpenSCAD to create the model of the case. This is a very useful tool since you will be writing scripts with exact measurements and can generate very complex things from basically simple components.
  • Poser Pro for the Anarani model, since I want the case to be held by a pretty elf and that’s too complex for OpenSCAD.
  • E-On Vue for the artistic rendering of my model.
  • Accutrans 3D to remove unwanted parts from the model and to remove all textures and merge all parts into a single model.
  • MeshMixer to set the scale of the model and to make it hollow. Meshmixer can also be used to put the model correctly upright, facing in the proper direction.
  • NetFabb Basic to do some more, automated repairs. Especially important when working with Poser models since Poser models aren’t made to be printed but rendered.
  • MeshLab as an alternative solution to repair models.

And finally I will send the model to Shapeways where it will be printed in white plastic. Other materials are also possible but white plastic tends to be the cheapest and strongest material. You can use sandstone and even colored sandstone, but sandstone isn’t very practical if you have small details like fingers, toes, noses, etc. Sandstone is great for making e.g. a bust of a model at a large size. However, sandstone requires walls of at least 2mm thick. Plastic can be as thin as 0.7mm…

In the end, I want to have a 3D printed model of about 20 cm high that I can put against my whiteboard and it will tell me the humidity and temperature.

So, that’s the plan. Let’s get started in part 2!